Highlights.app not ready for prime time

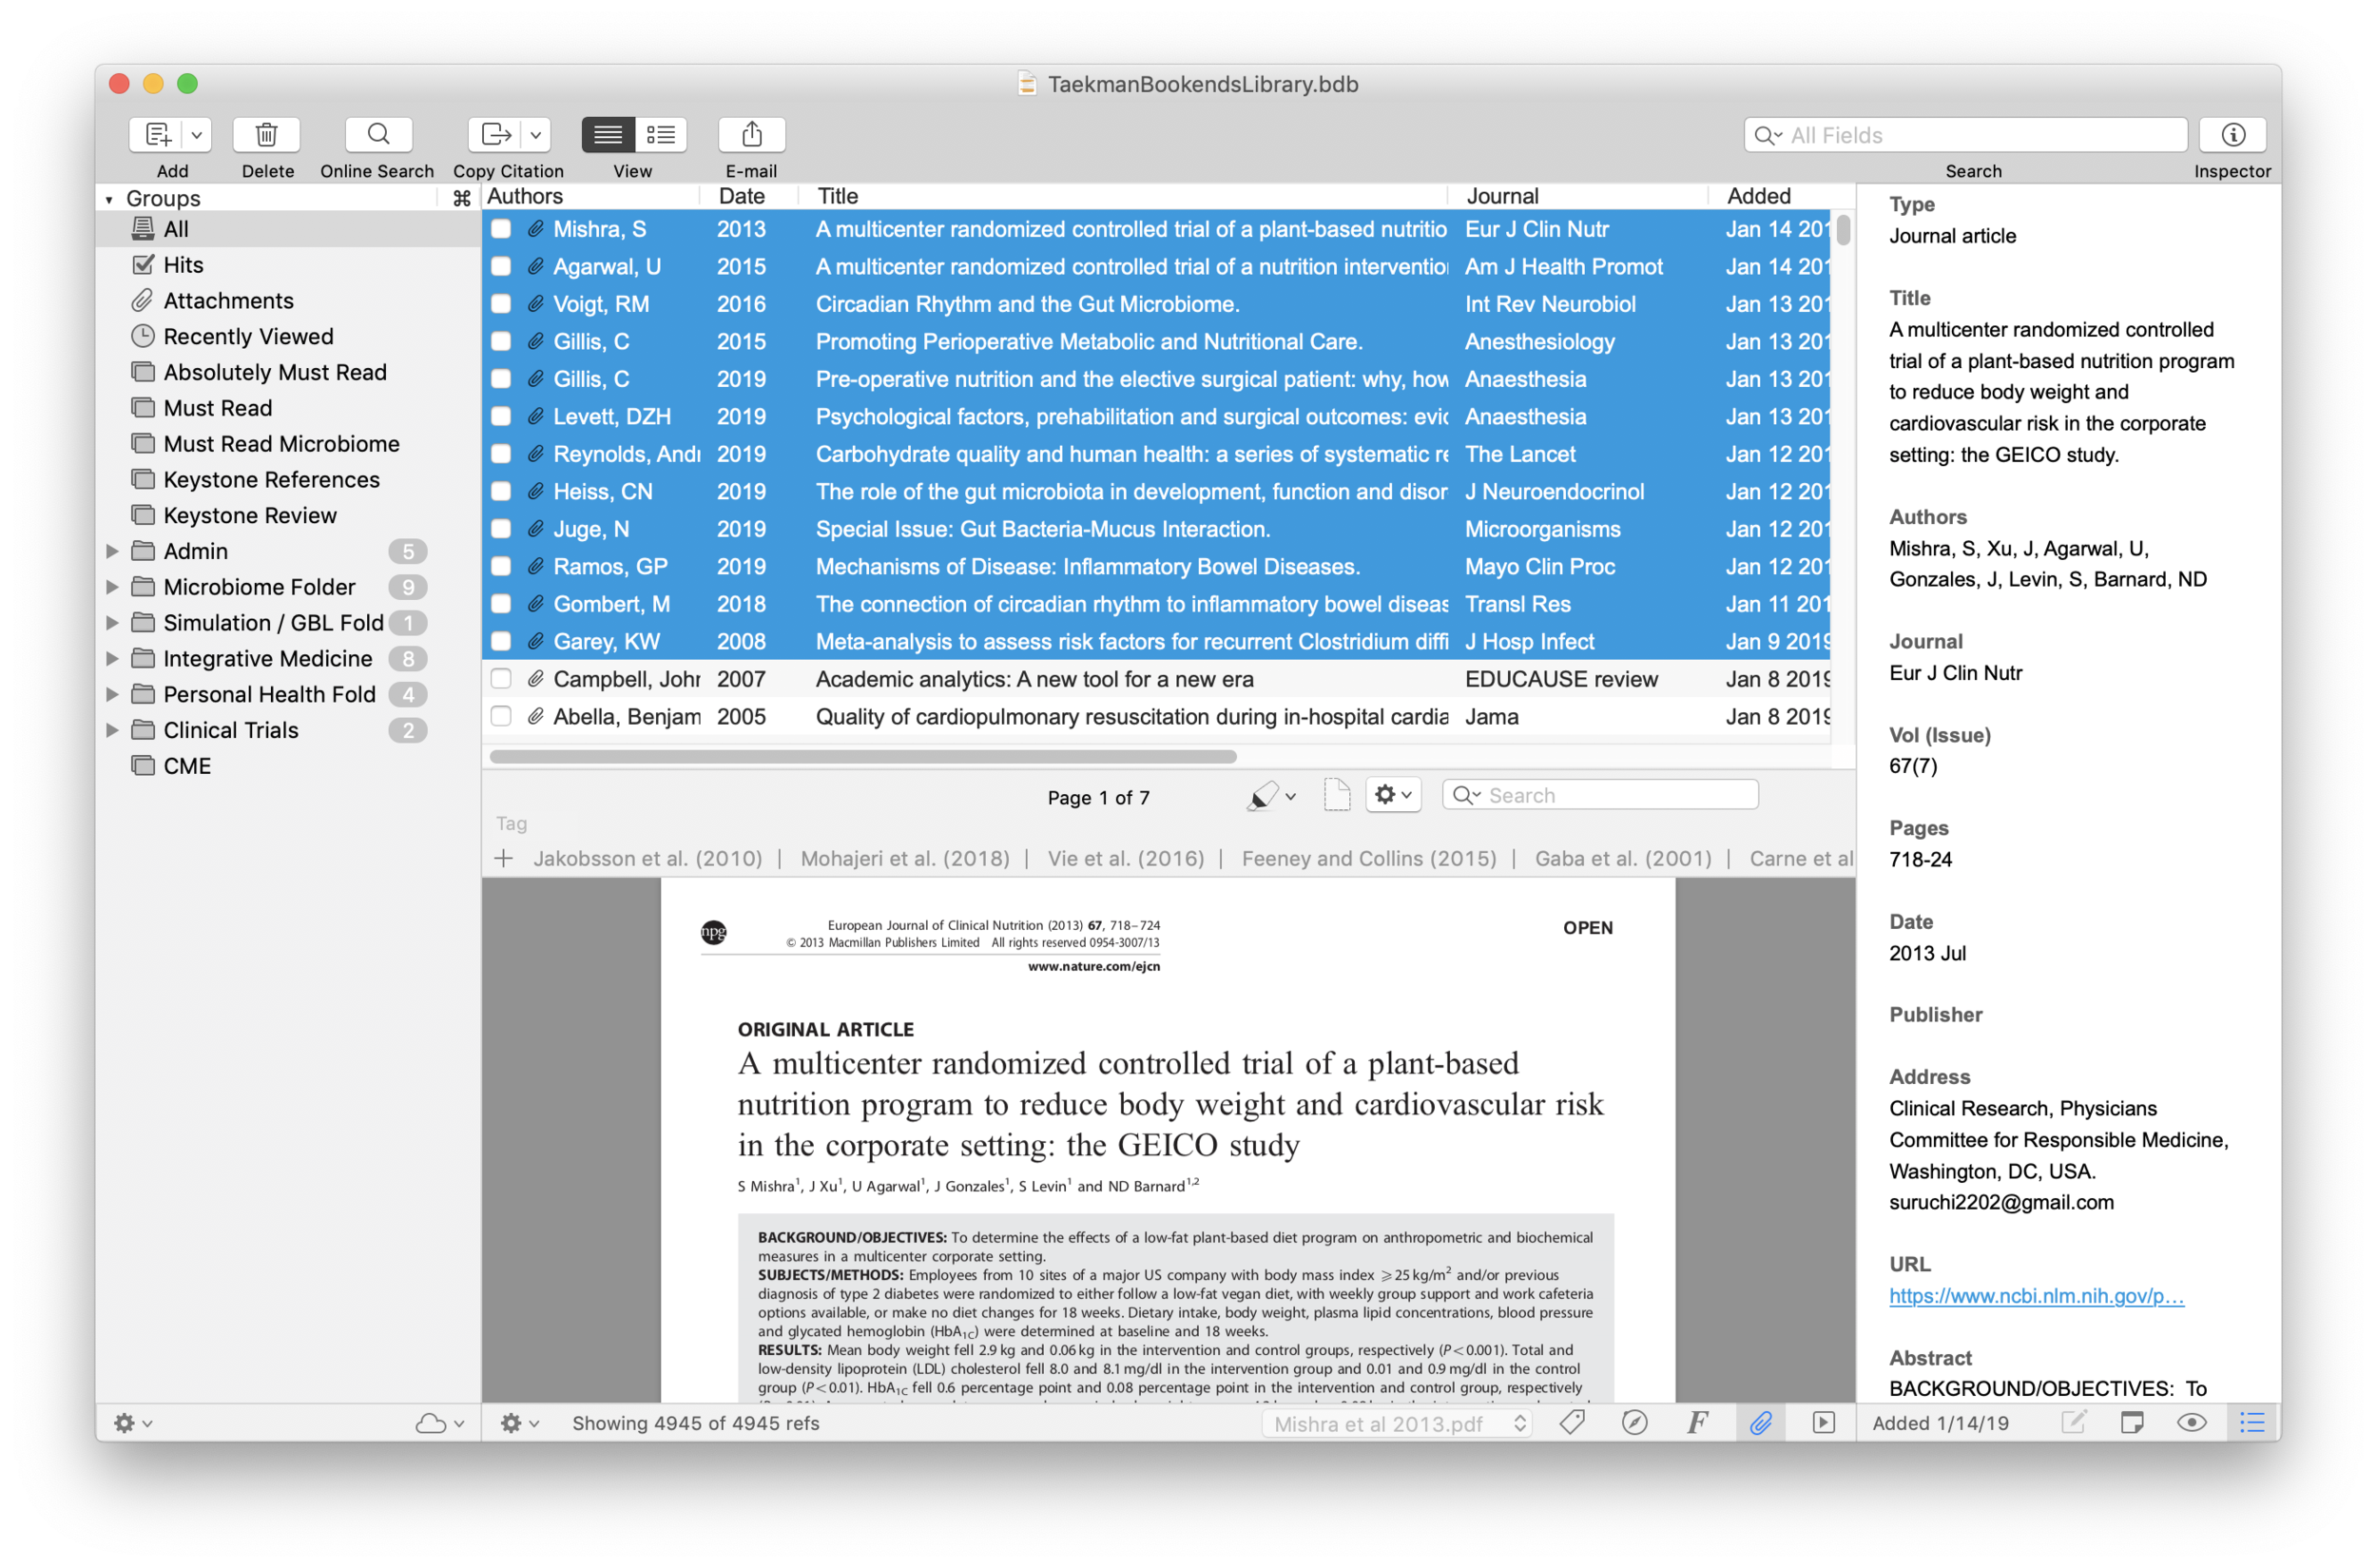
On recommendation of several people, I decided to try the annotation app, Highlights. Although I was intrigued with several of the features, after extensive use, I can’t recommend the app. The program still needs work before I could reliably use it in my writing workflow.I found two of Highlights features especially attractive:

  1. The ability to extract each highlight or comment as its own markdown file.
  2. The ability to underline references in the PDF and have those references automatically appended/linked to extracted notes.

I trialed Highlights for about a week. Ultimately, even with the intriguing features, The appnwas far too buggy for me to adopt.Here are some of the issues I faced:

  1. References would not reliably link to a note. I could find no rhyme or reason for this behavior. Sometimes the feature worked, sometimes it didn’t. No matter what I tried, I was unable to remedy this issue. My attempt at editing markdown files led to frustration—my edits were often erased.
  2. Even when the reference extraction worked, there is a bug that alters the markdown file, adding additional markdown to each reference. With many references, this bug makes each file unreadable.
  3. I found no way to configure the order, type, and appearance of the metadata.
  4. Extraction of figures from the manuscript were buggy and unreliable.
  5. Metadata was impossible to change. Initially, I set Up the app to automatically retrieve metadata. Unfortunately, several of the paPers the software Retrieved had erroneous metadata. Once imported, I found the metadata impossible to change. Since I add the title, author, And other metadata to every one of my extracted notes, this was The fatal flaw that caused me to end my trial.

Although I am intrigued by several of the features of the Highlights App, I will continue to use my tried and true method of note extraction using Skim. I plan keeping an eye peeled for these issues to be fixed within Highlights. With some improvements, I could see the app becoming my Mac PDF reader of choice.

LiquidText PDF Reader

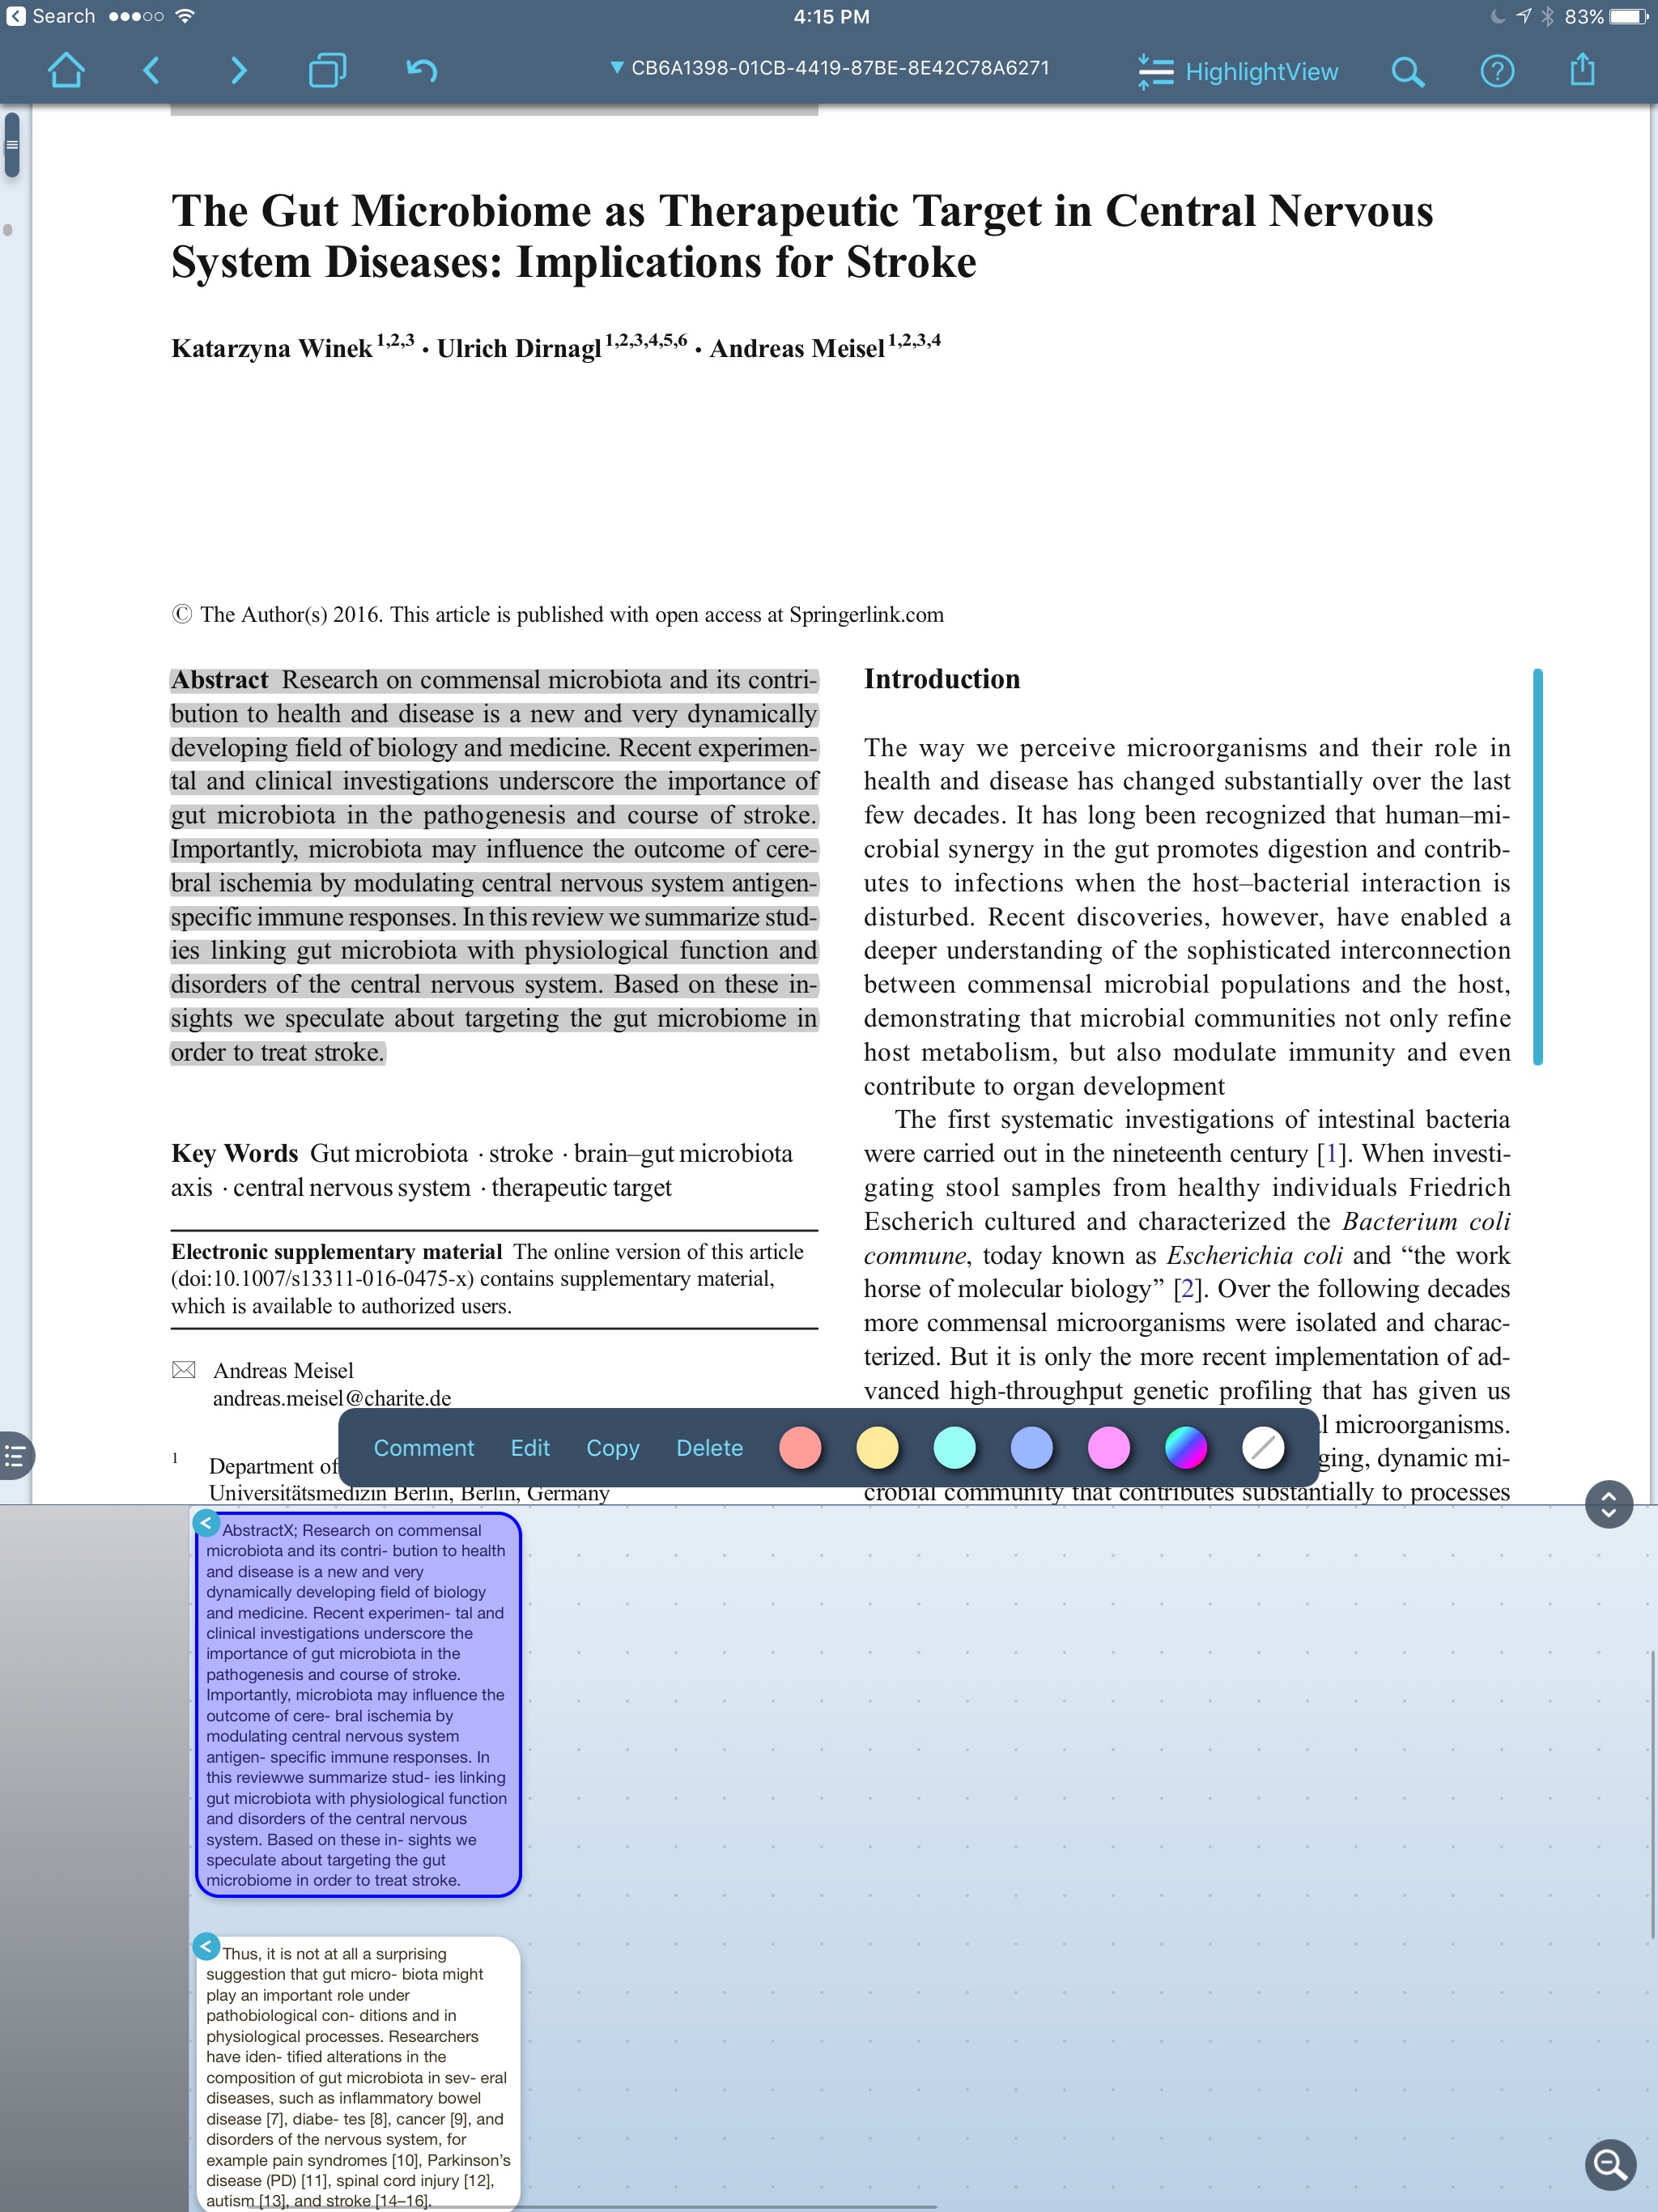
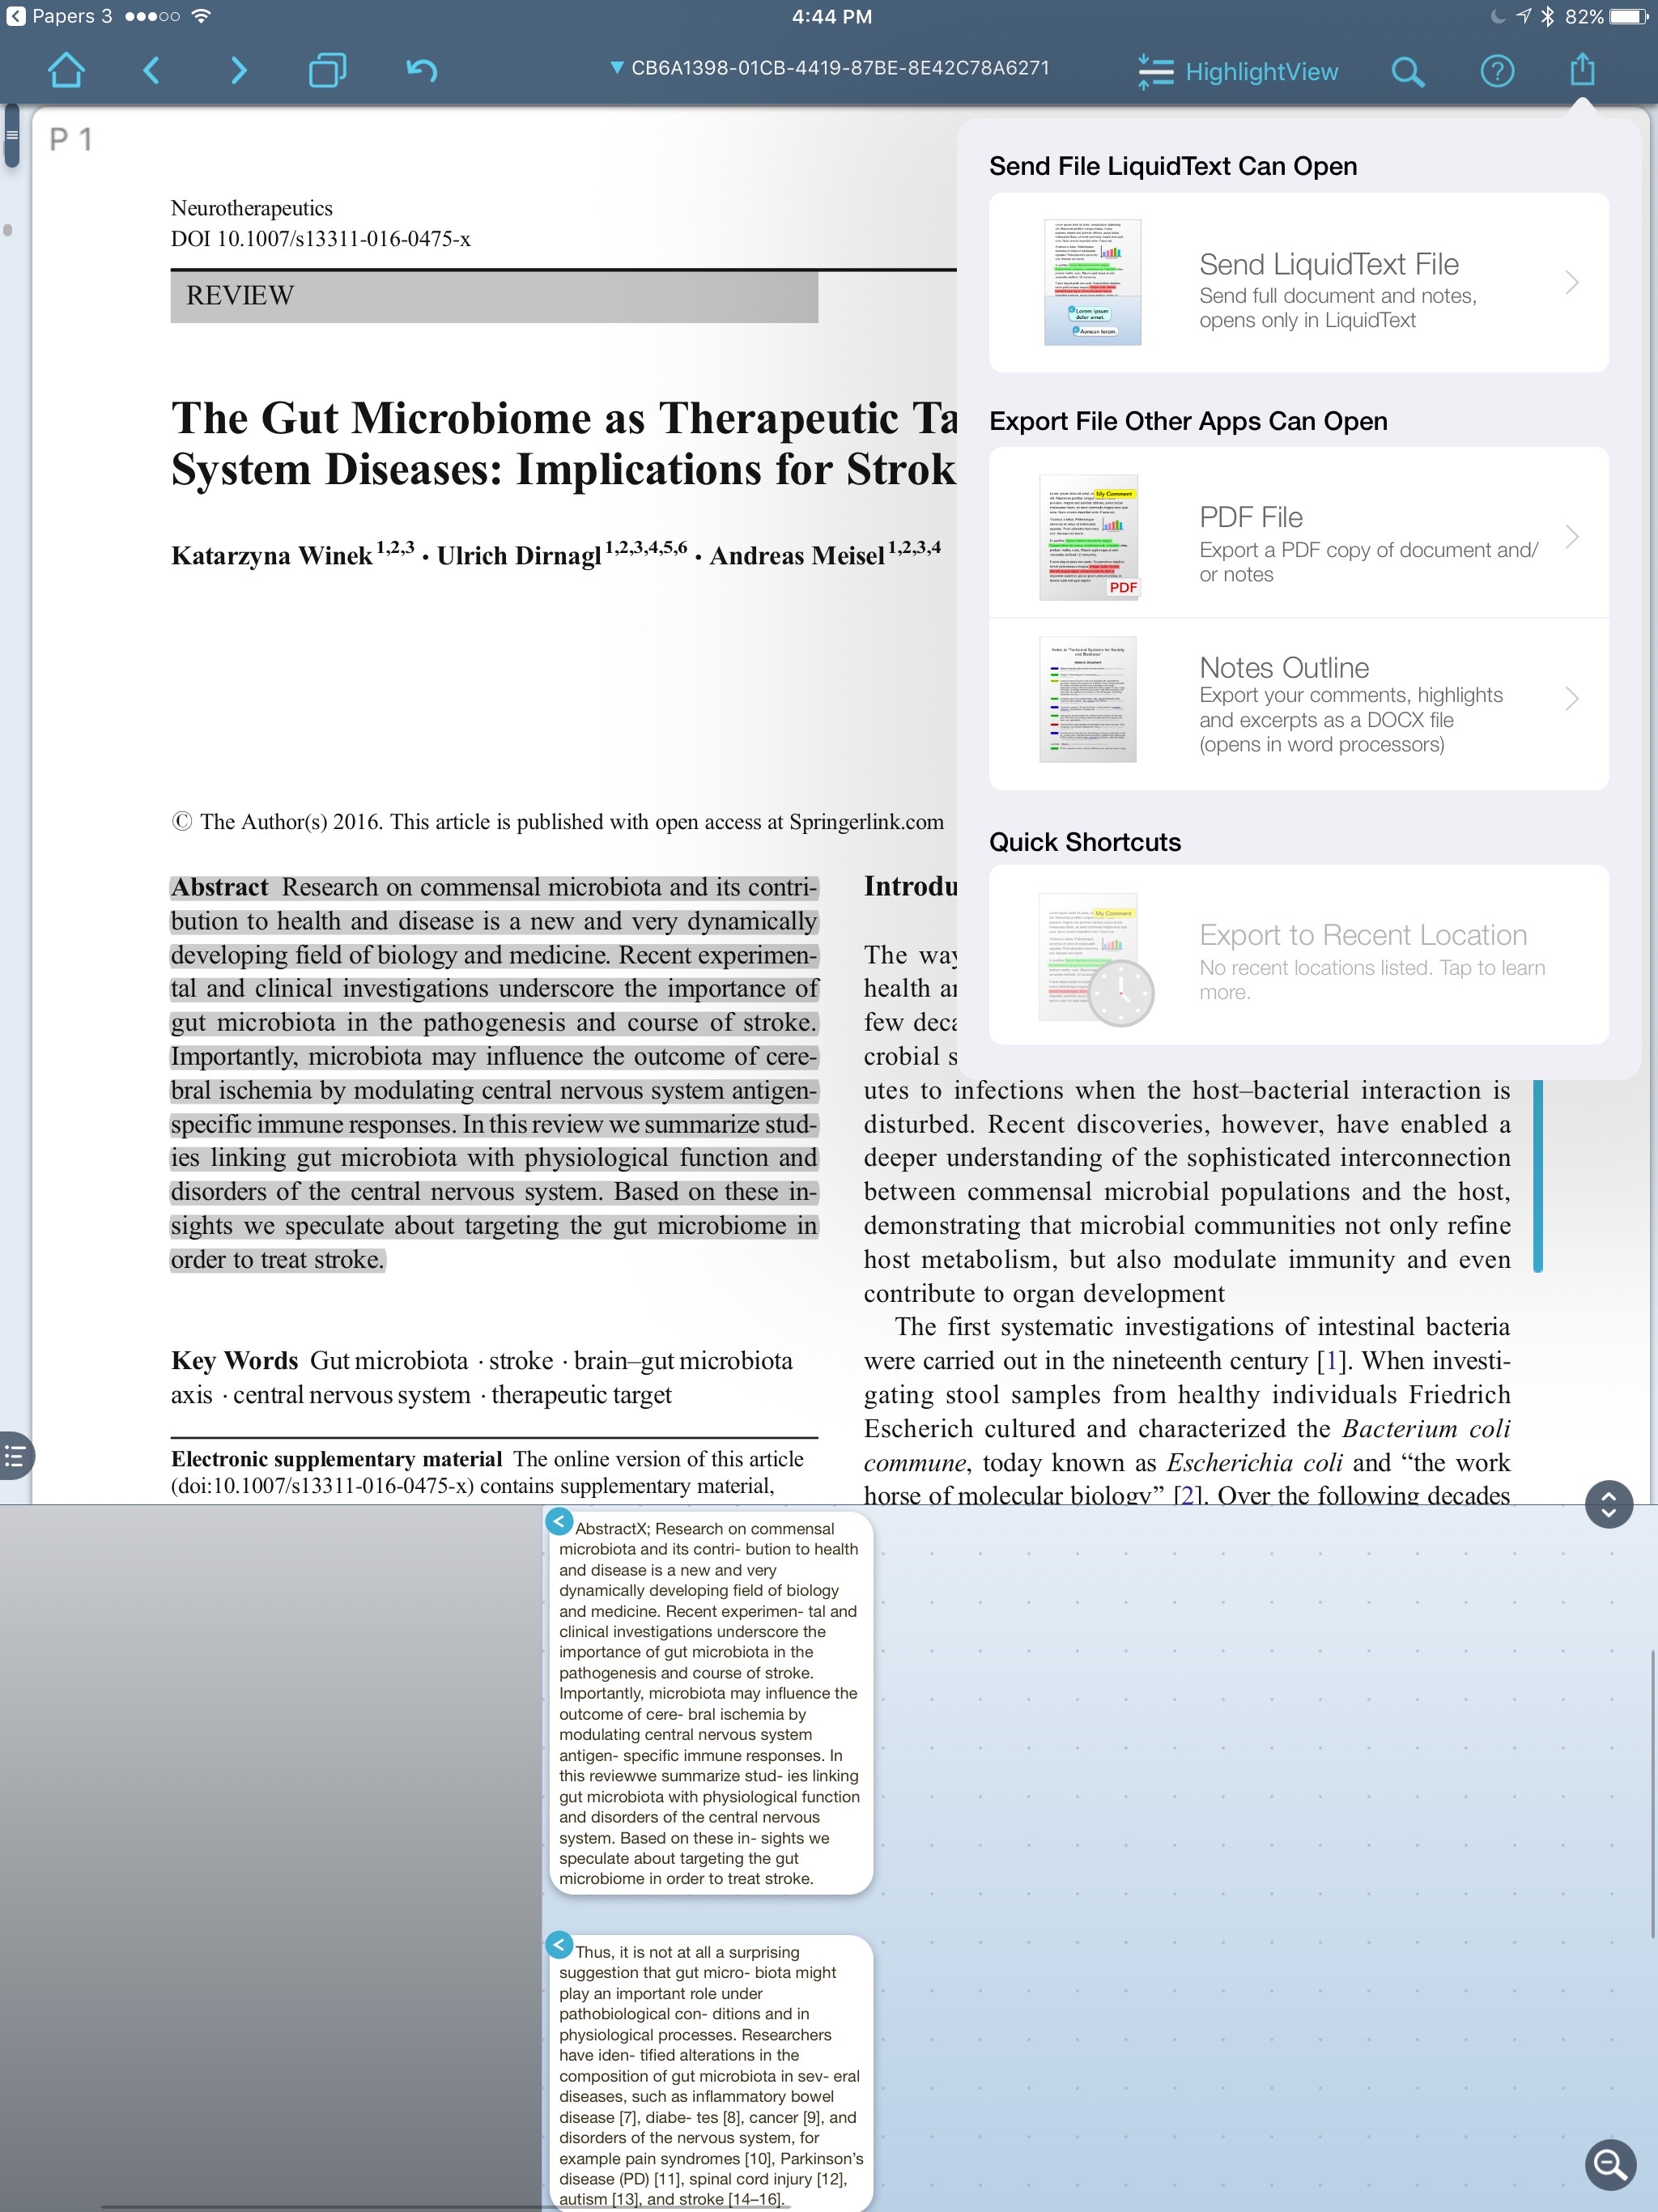
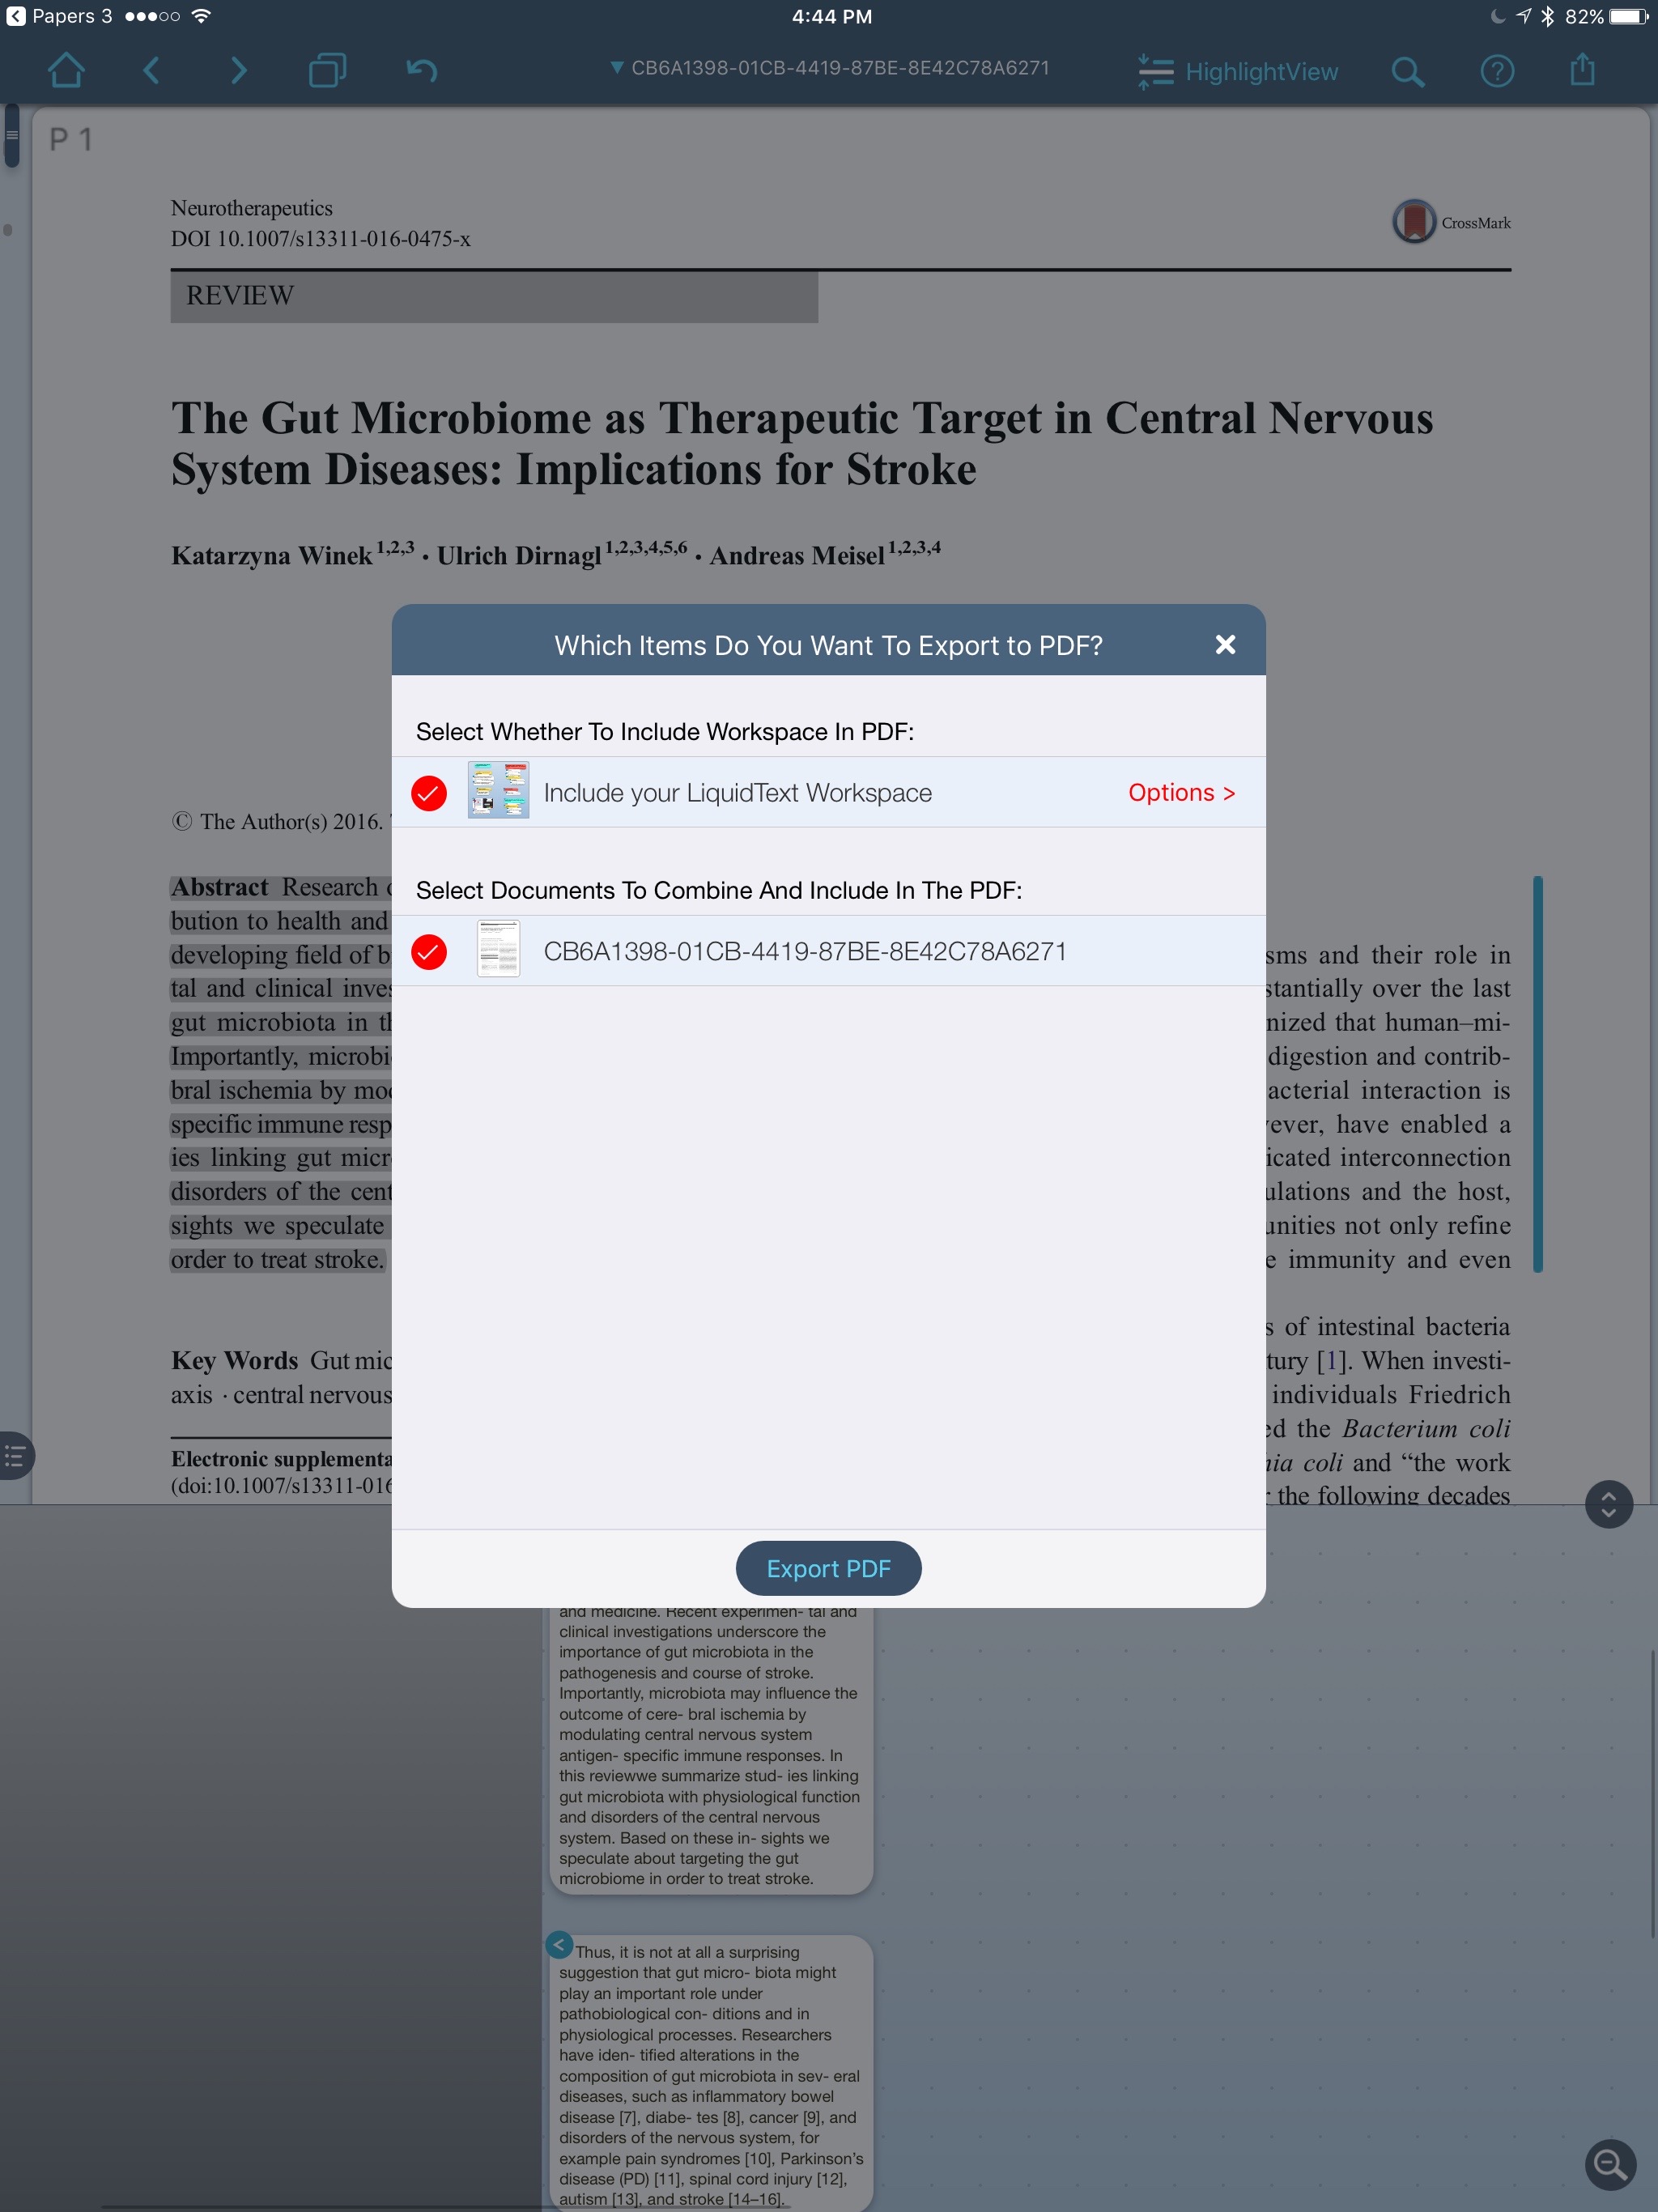
I have experimented with different PDF readers on my iPad. Over the past several months I’ve exclusively used a program called LiquidText.LiquidText has a unique, award-winning, interface that allows me to drag, drop, and manipulate text using my finger. LiquidText was named “Most Innovative iPad App of the Year” by Apple in 2015. LiquidText feels much more natural than any other PDF reader I’ve used on iOS--and I've used many. After highlighting with my finger, the exerpts / highlights / comments are extracted into their own area. The excerpts may be dragged around, linked, and repositioned at will.When reading and highlighting, I either drag text from the PDF into the notes area, or simply hit “AutoExcerpt” and the text is extracted for me. I can comment on the excerpted information.I can also view the place in the paper the highlight came from by merely touching the excerpt in the notes area.LiquidText reads and writes to a whole range of cloud services, but has limited range of export document choices.An Enterprise version is available for $9.99 that adds features like multi-document search and the ability to comment on multiple documents simultaneously. I've been using the app so much, I upgraded primarily to support the developer.There are a few features that are not (yet) available—the most critical for me is the inability to export highlights into a text file—LiquidText only exports highlights to Microsoft Word. This, unfortunately, is not compatible with my workflow for extracting highlights, but I like Liquidtext so much, I figured out a workaround using Skim—here is my entire workflow:
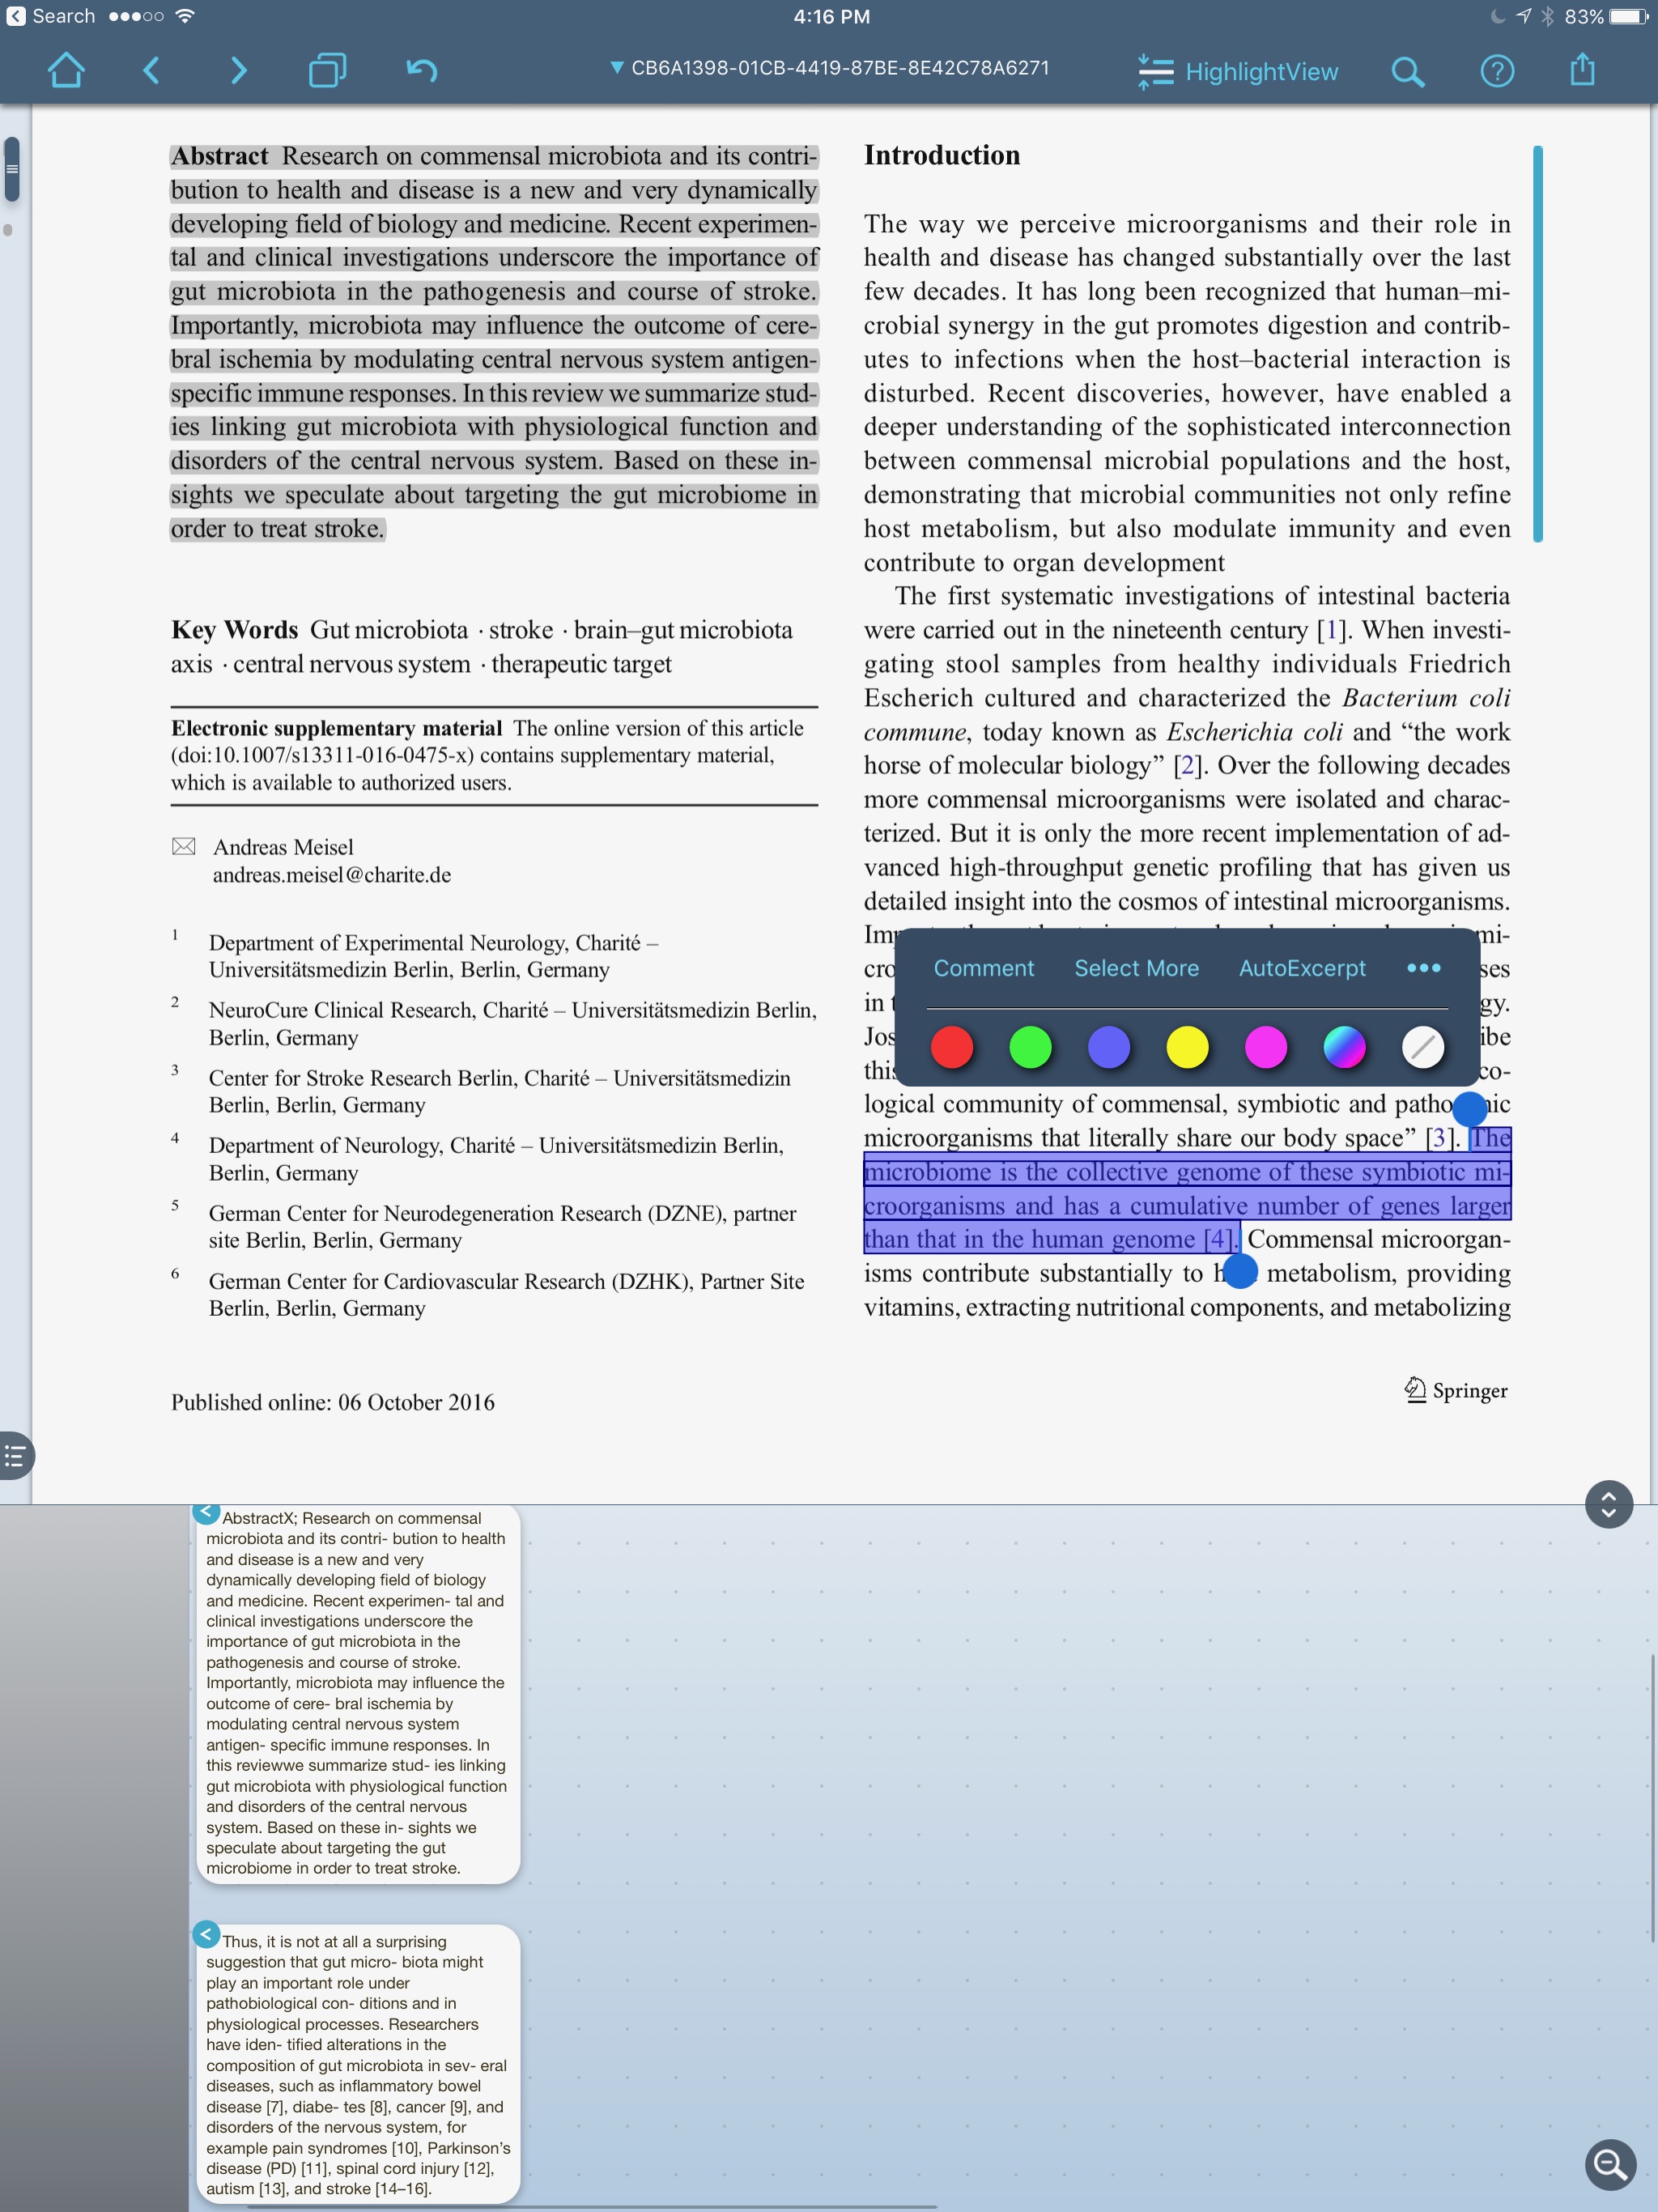
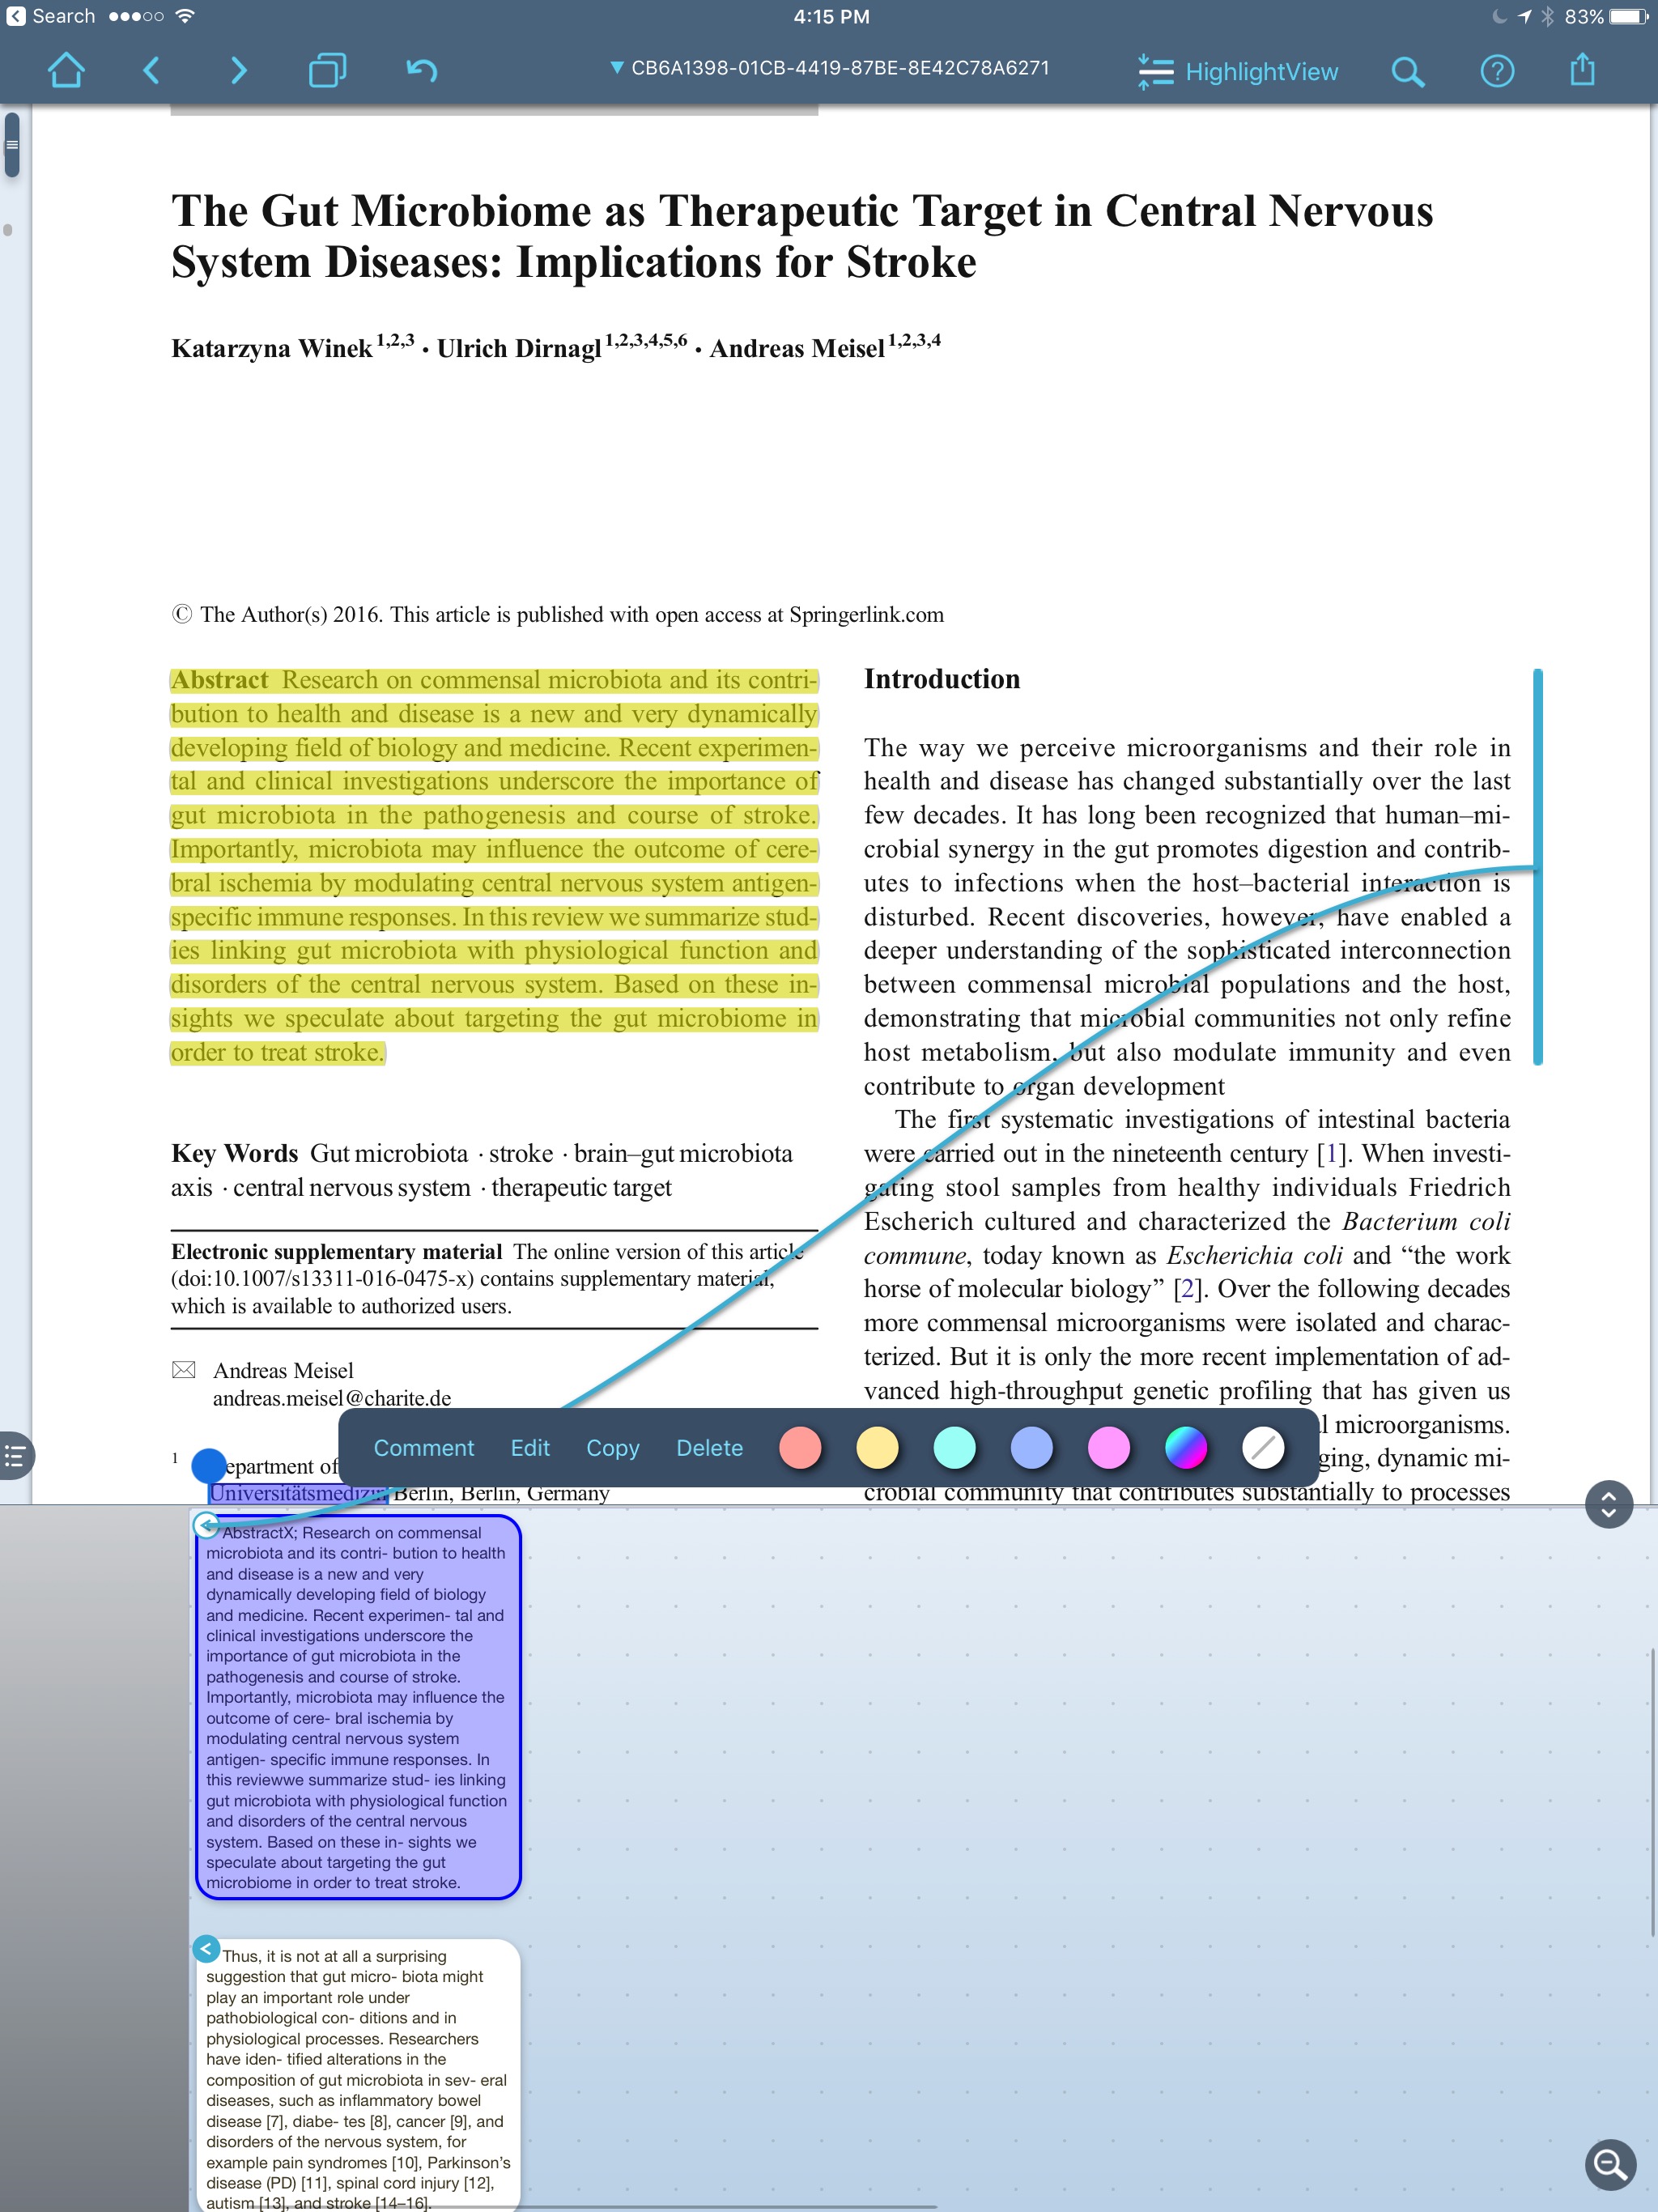
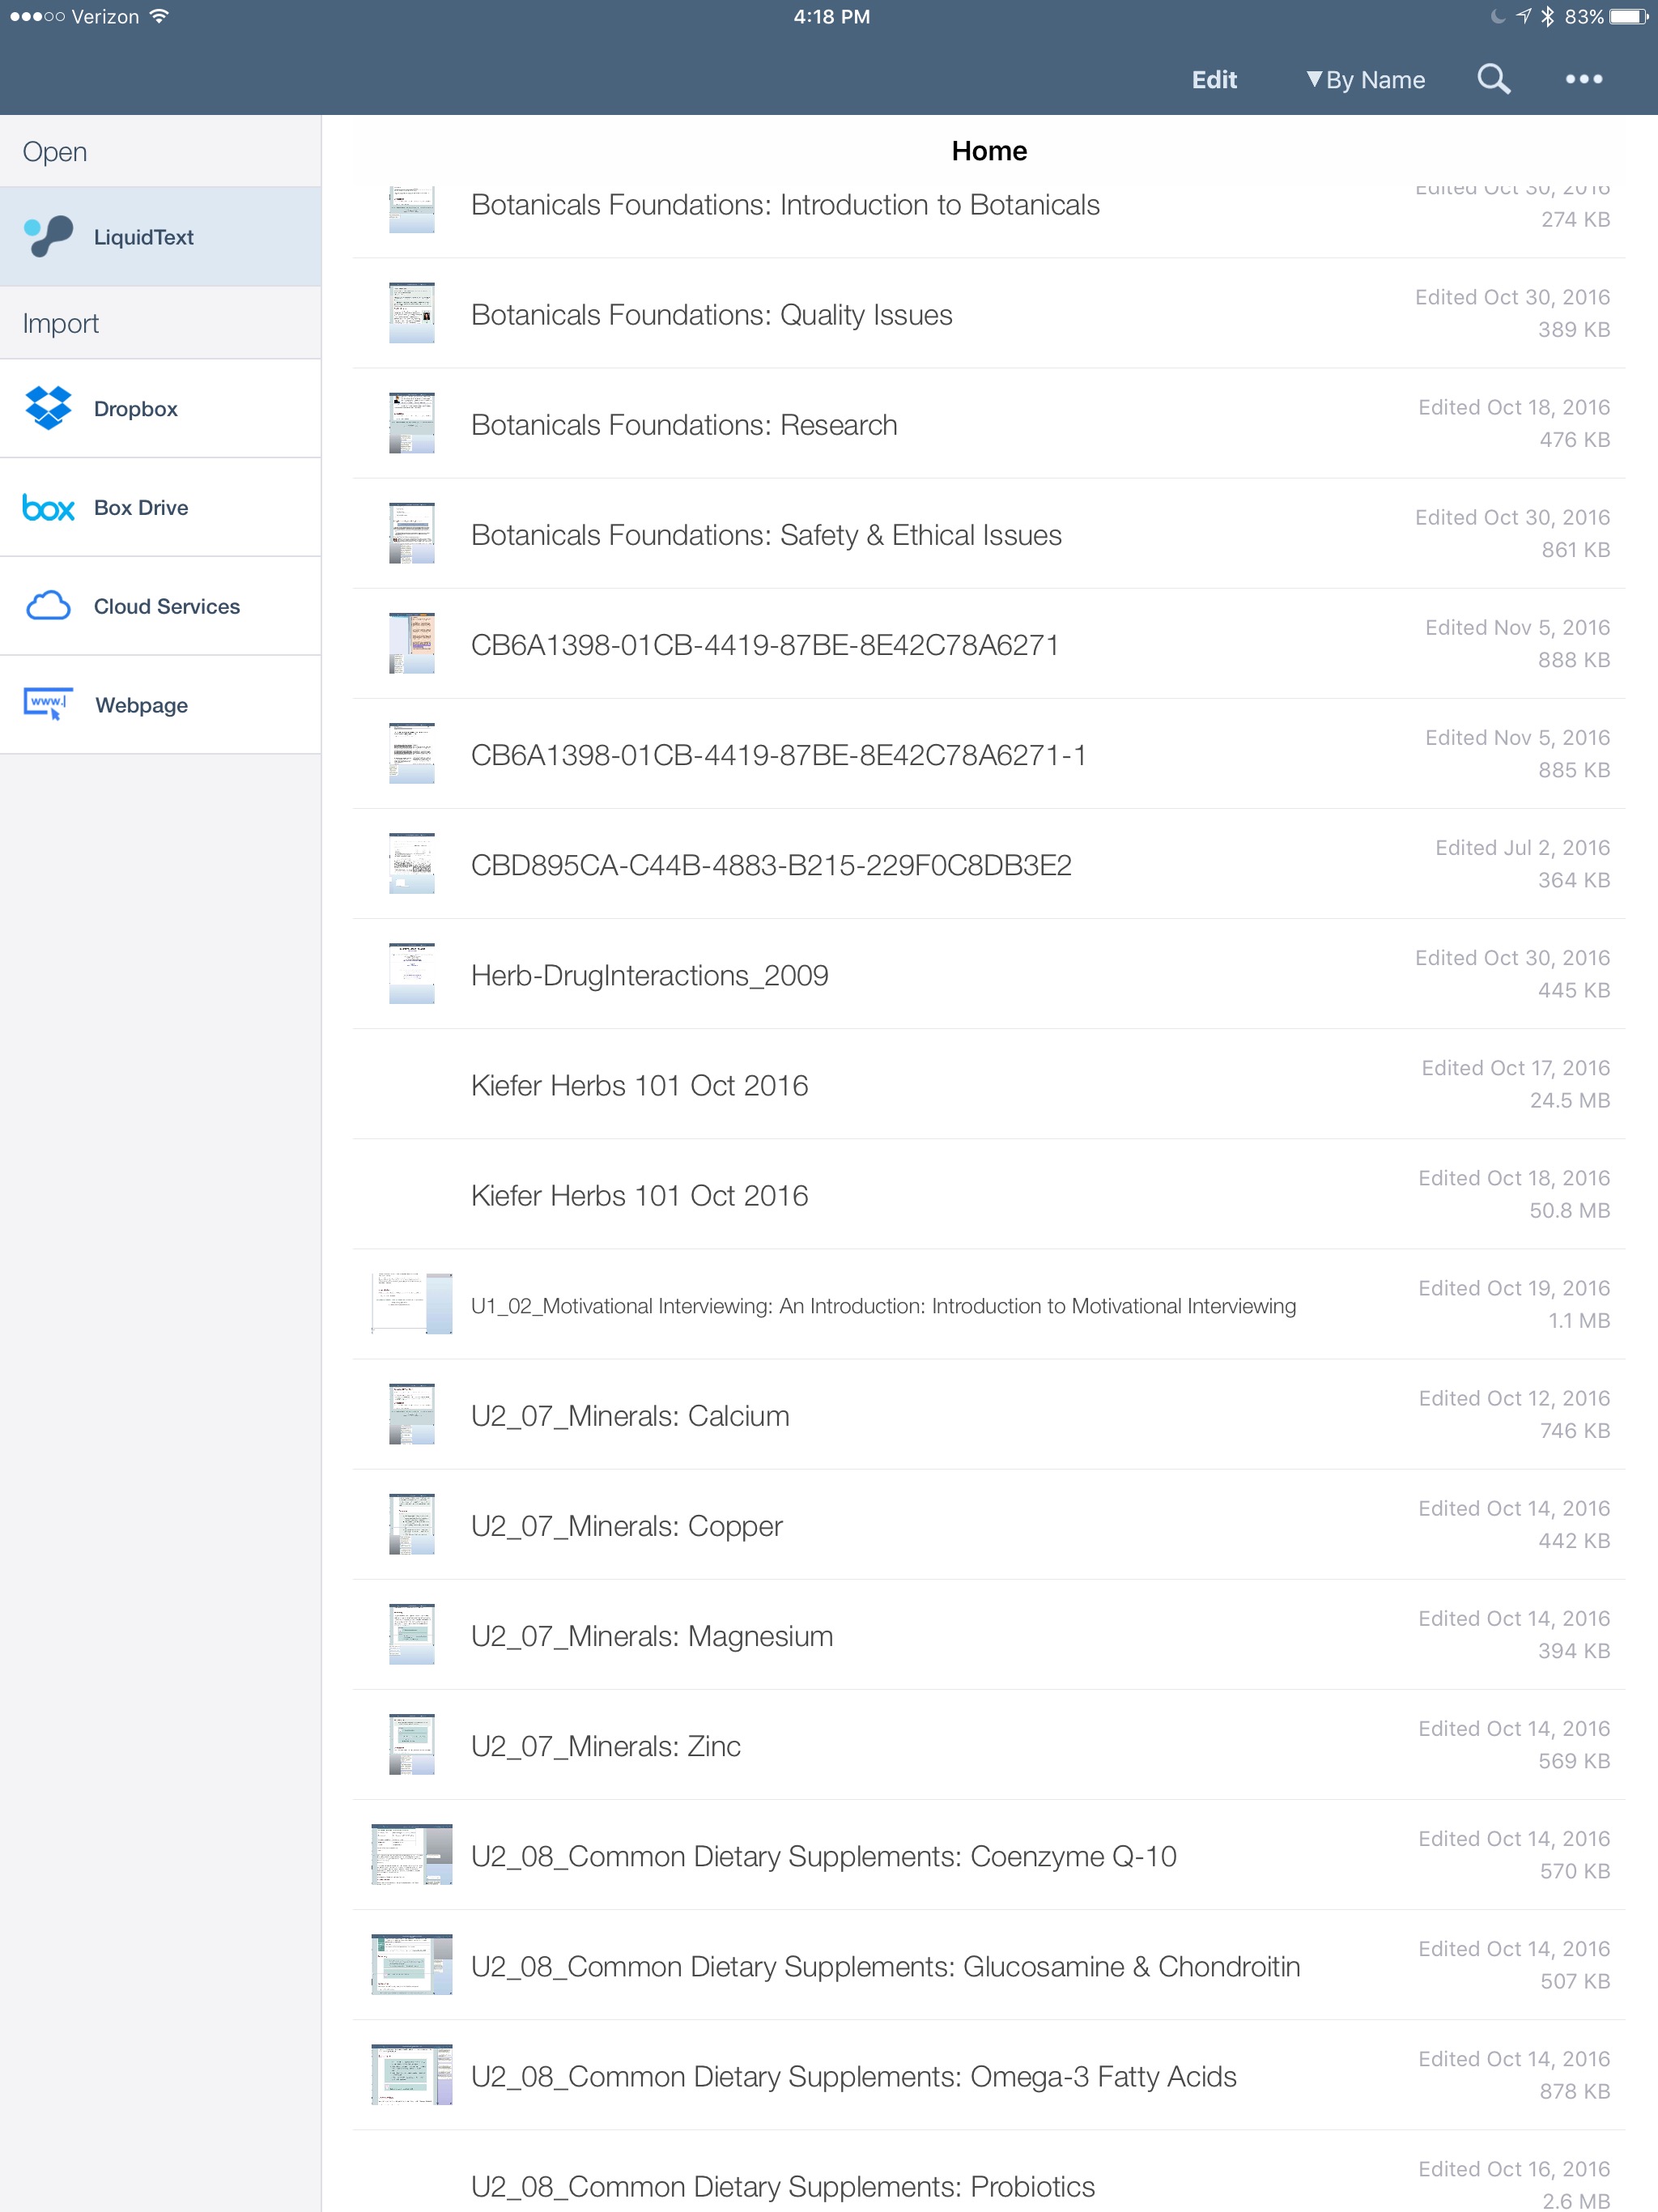
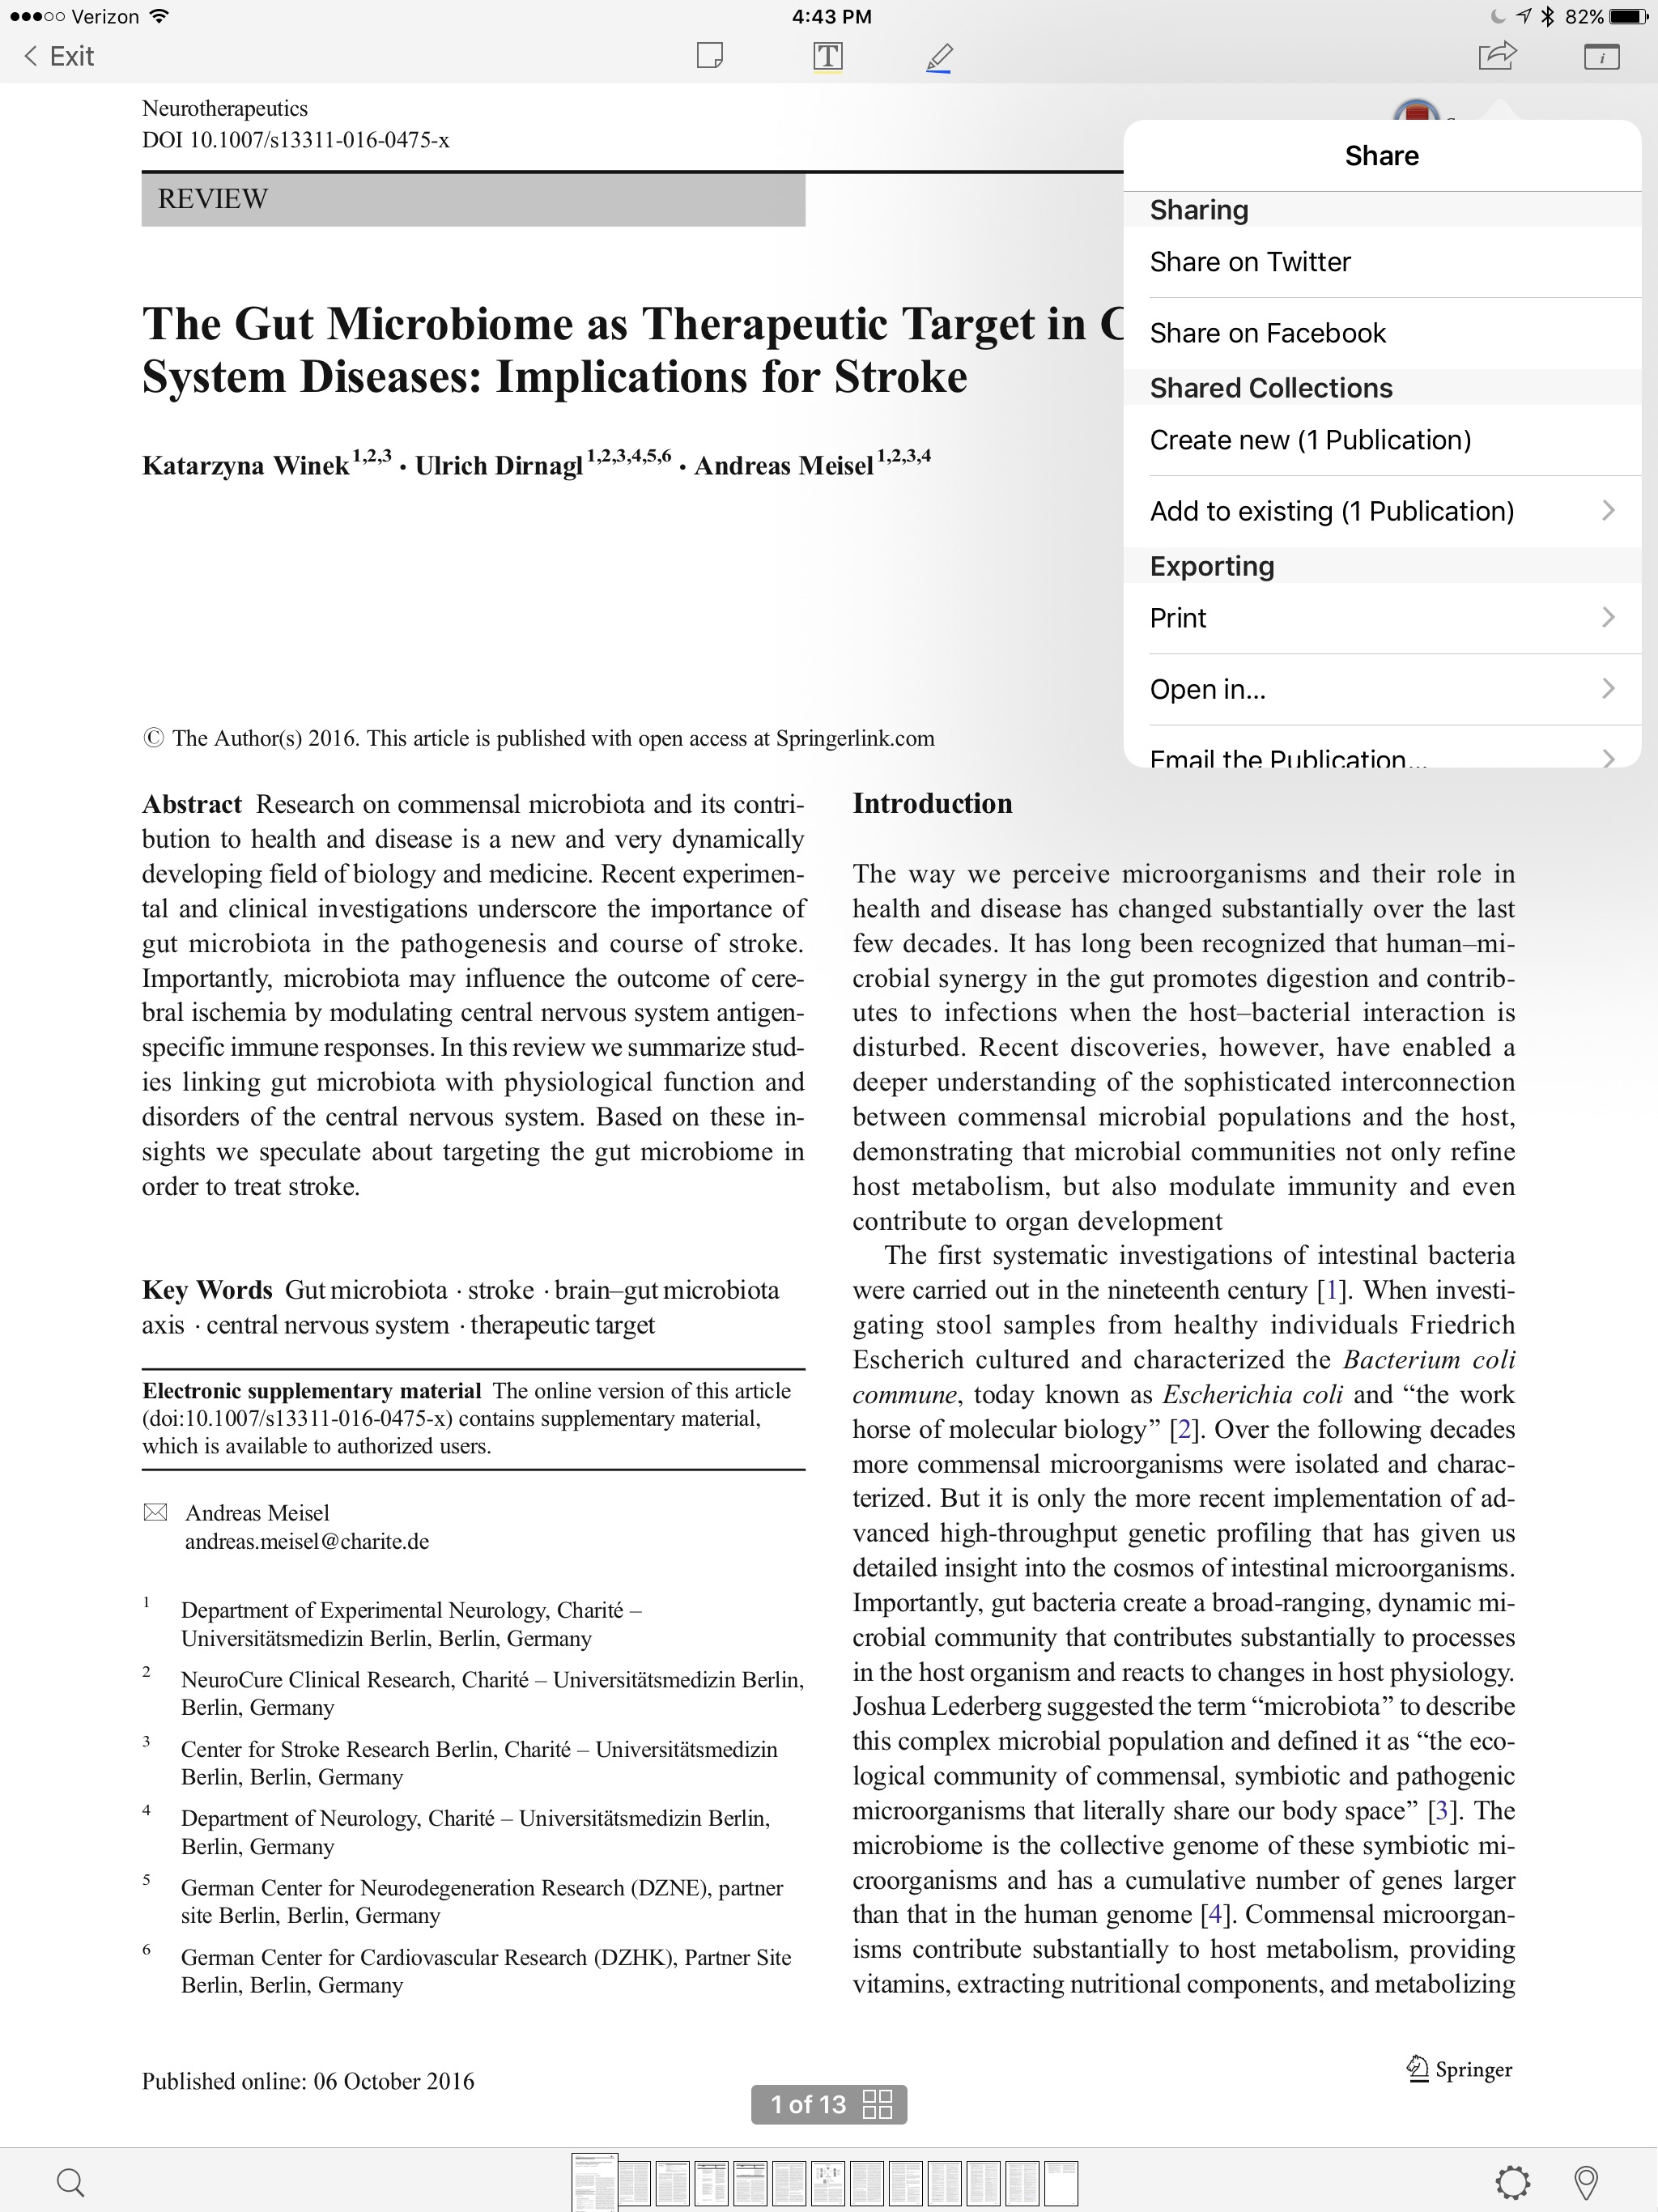
  • I set up a Dropbox LiquidText Folder to serve as a bridge with my desktop.
  • I open the entry in Papers on iOS.
  • From within Papers I select "open in". -this brings up action menu.
  • I open, read, and annotate in Liquidtext. This includes linking the full-text of references to each excerpt (as suggested by reader GH).
  • I export the PDF and Notes from Liquidtext to my Dropbox Folder.
  • When I get to my Mac, I open the PDF in Skim.
  • Under the File Menu in Skim, I choose “Convert Notes” making my highlights into Skim Notes.
  • I then process the annotations as discussed in this blog entry.
  • (If you want to take the time on your desktop you can also replace the Papers PDF with the LiquidText highlighted version).

Give Liquidtext a try and please let me know what you think.

Writing and Reading Workflow: Batching and Automating Full-Text Retrieval

In my work at Duke University on simulation, games-based learning, and learning technology, I frequently read and write scientific information. I’ve developed a series of workflows to help me efficiently deal with information when writing papers and grants. In a previous entry I talked about how I try to batch operations, doing similar things at the same time. This entry will be about my workflow for reading scientific manuscripts.

I use Skim for scientific reading, typically using the bottom pane of the “Split PDF” feature to look at the title of references as I come across them in the body of the manuscript. On average, I’m interested in downloading about 10% of these references to my personal library.

Although I love Skim, one feature I have not been able to figure out is how to highlight items in the bottom split screen. Thus, I’ve created a workaround. Before I start reading an article in Skim, I create a note called “Get Manuscripts” As I’m reading, I merely record the references number of articles I want to fetch in my “Get References” note. Because I create this note first it’s always located at the top of my Skim Notes. When I’m done reading the current article and processing my annotations, I retrieve the supporting articles I identified while reading. 

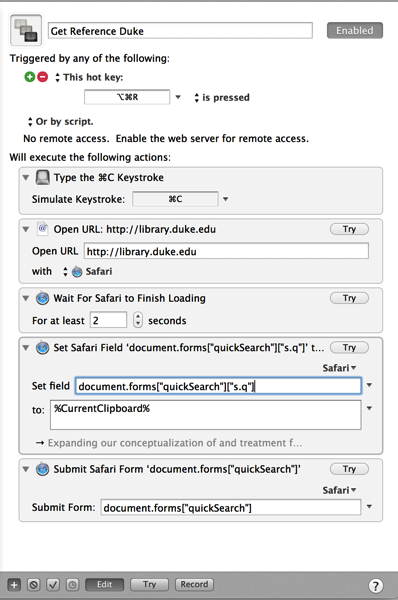
To do this, I use a phenomenal program called KeyBoard Maestro. Keyboard Maestro lets me type a single keyboard command to trigger an entire workflow. One by one, I work through my “Get References” numbers, highlighting the title of each corresponding article. After highlighting each title, Keyboard Maestro does the rest (invoked by Command-Option-R).

Keyboard Maestro automatically  (1) copies my highlighted text, (2) surfs to the Duke Library literature search page, (3) pastes the text string into the appropriate field, and (4) submits the search. Thus, with a single key combination, I am able to download the full text of supporting literature. Once I find the full text I'm interested in (usually a PDF), I save it to my Download Folder, where Hazel takes over and imports the paper into my Papers Library.

If I'm not ready to retrieve the articles, I create an Omnifocus Action for each to be collected at a later time.

My macro is not limited to Skim, it works with any text I’ve highlighted, be it on the web, in a manuscript, or somewhere else. Here is a picture of the programming, but obviously, you’ll have to modify it for your own favorite full-text repository. Enjoy!

Maestro Automate Full Text Retrieval


Addendum (January 14, 2014): If you’re searching at Duke, you’ve probably noticed the library changed its search interface. I’ve updated the Keyboard Maestro Script accordingly. It’s only configured to search for peer-reviewed articles. Download the script and import it into Keyboard Maestro (will only work for Duke Libraries).

Writing Workflows: Processing Annotations (All Roads Lead to Skim)

One of the great things about the internet is its ability to enable collaboration--workflows are never static, each of us builds on the work of others to enhance our own productivity. After my last post, Writing Workflows: Capturing Annotations to Enhance Scientific Writing and Knowledge Retrieval, I received a boat-load of comments, suggestions, and links. Thanks!I suggest you take a look at an entry in Aleh Cherp's excellent Macademic blog. In a recent entry,  a guest author discussed  limitations with the built-in annotation tools of Papers, Sente, and Mendelay. His preference for annotating manuscripts is the open-source Skim. I've been playing with Skim recently (especially some of the post-annotation processing tools). I used Skim in the past, but curtailed my use in order to simplify my workflow (doing everything within Papers2). Despite the rich annotation tools in Skim, I set it aside because of the extra steps needed to make Skim highlights visible in Papers (and visa versa).As pointed out in the comments section of my last entry, the Achilles Heel of my annotation workflow is the need to separate my highlights / notes file by hand (Papers puts out a single aggregate file with all highlights and notes batched together). Although there are scripts available to send Papers2 notes to DevonThink Pro, I could never get them to work properly. I'm experimenting with a modification to my previous workflow--one that will significantly speed up the process:

  • I highlight and make notes in Papers2 on my Mac or iPad as I discussed in my last entry
  • When I've finished annotating, I make sure the most current version of the paper is synchronized back to my Mac. I then "Export PDF File and Media" from the File Menu in Papers2 and save to a convenient location (I use my Desktop). 
  • I then open the document saved to the Desktop in Skim and choose "Convert Notes" from the File Menu in Skim (this results in all the embedded notes being converted to Skim Notes).
  • I open and select the "Inbox" of my Literature Database in Devonthink (this is the location the script will save my comments).
  • With Skim still open, I run the following SKIM PDF Notes to DEVONthink script I downloaded here.
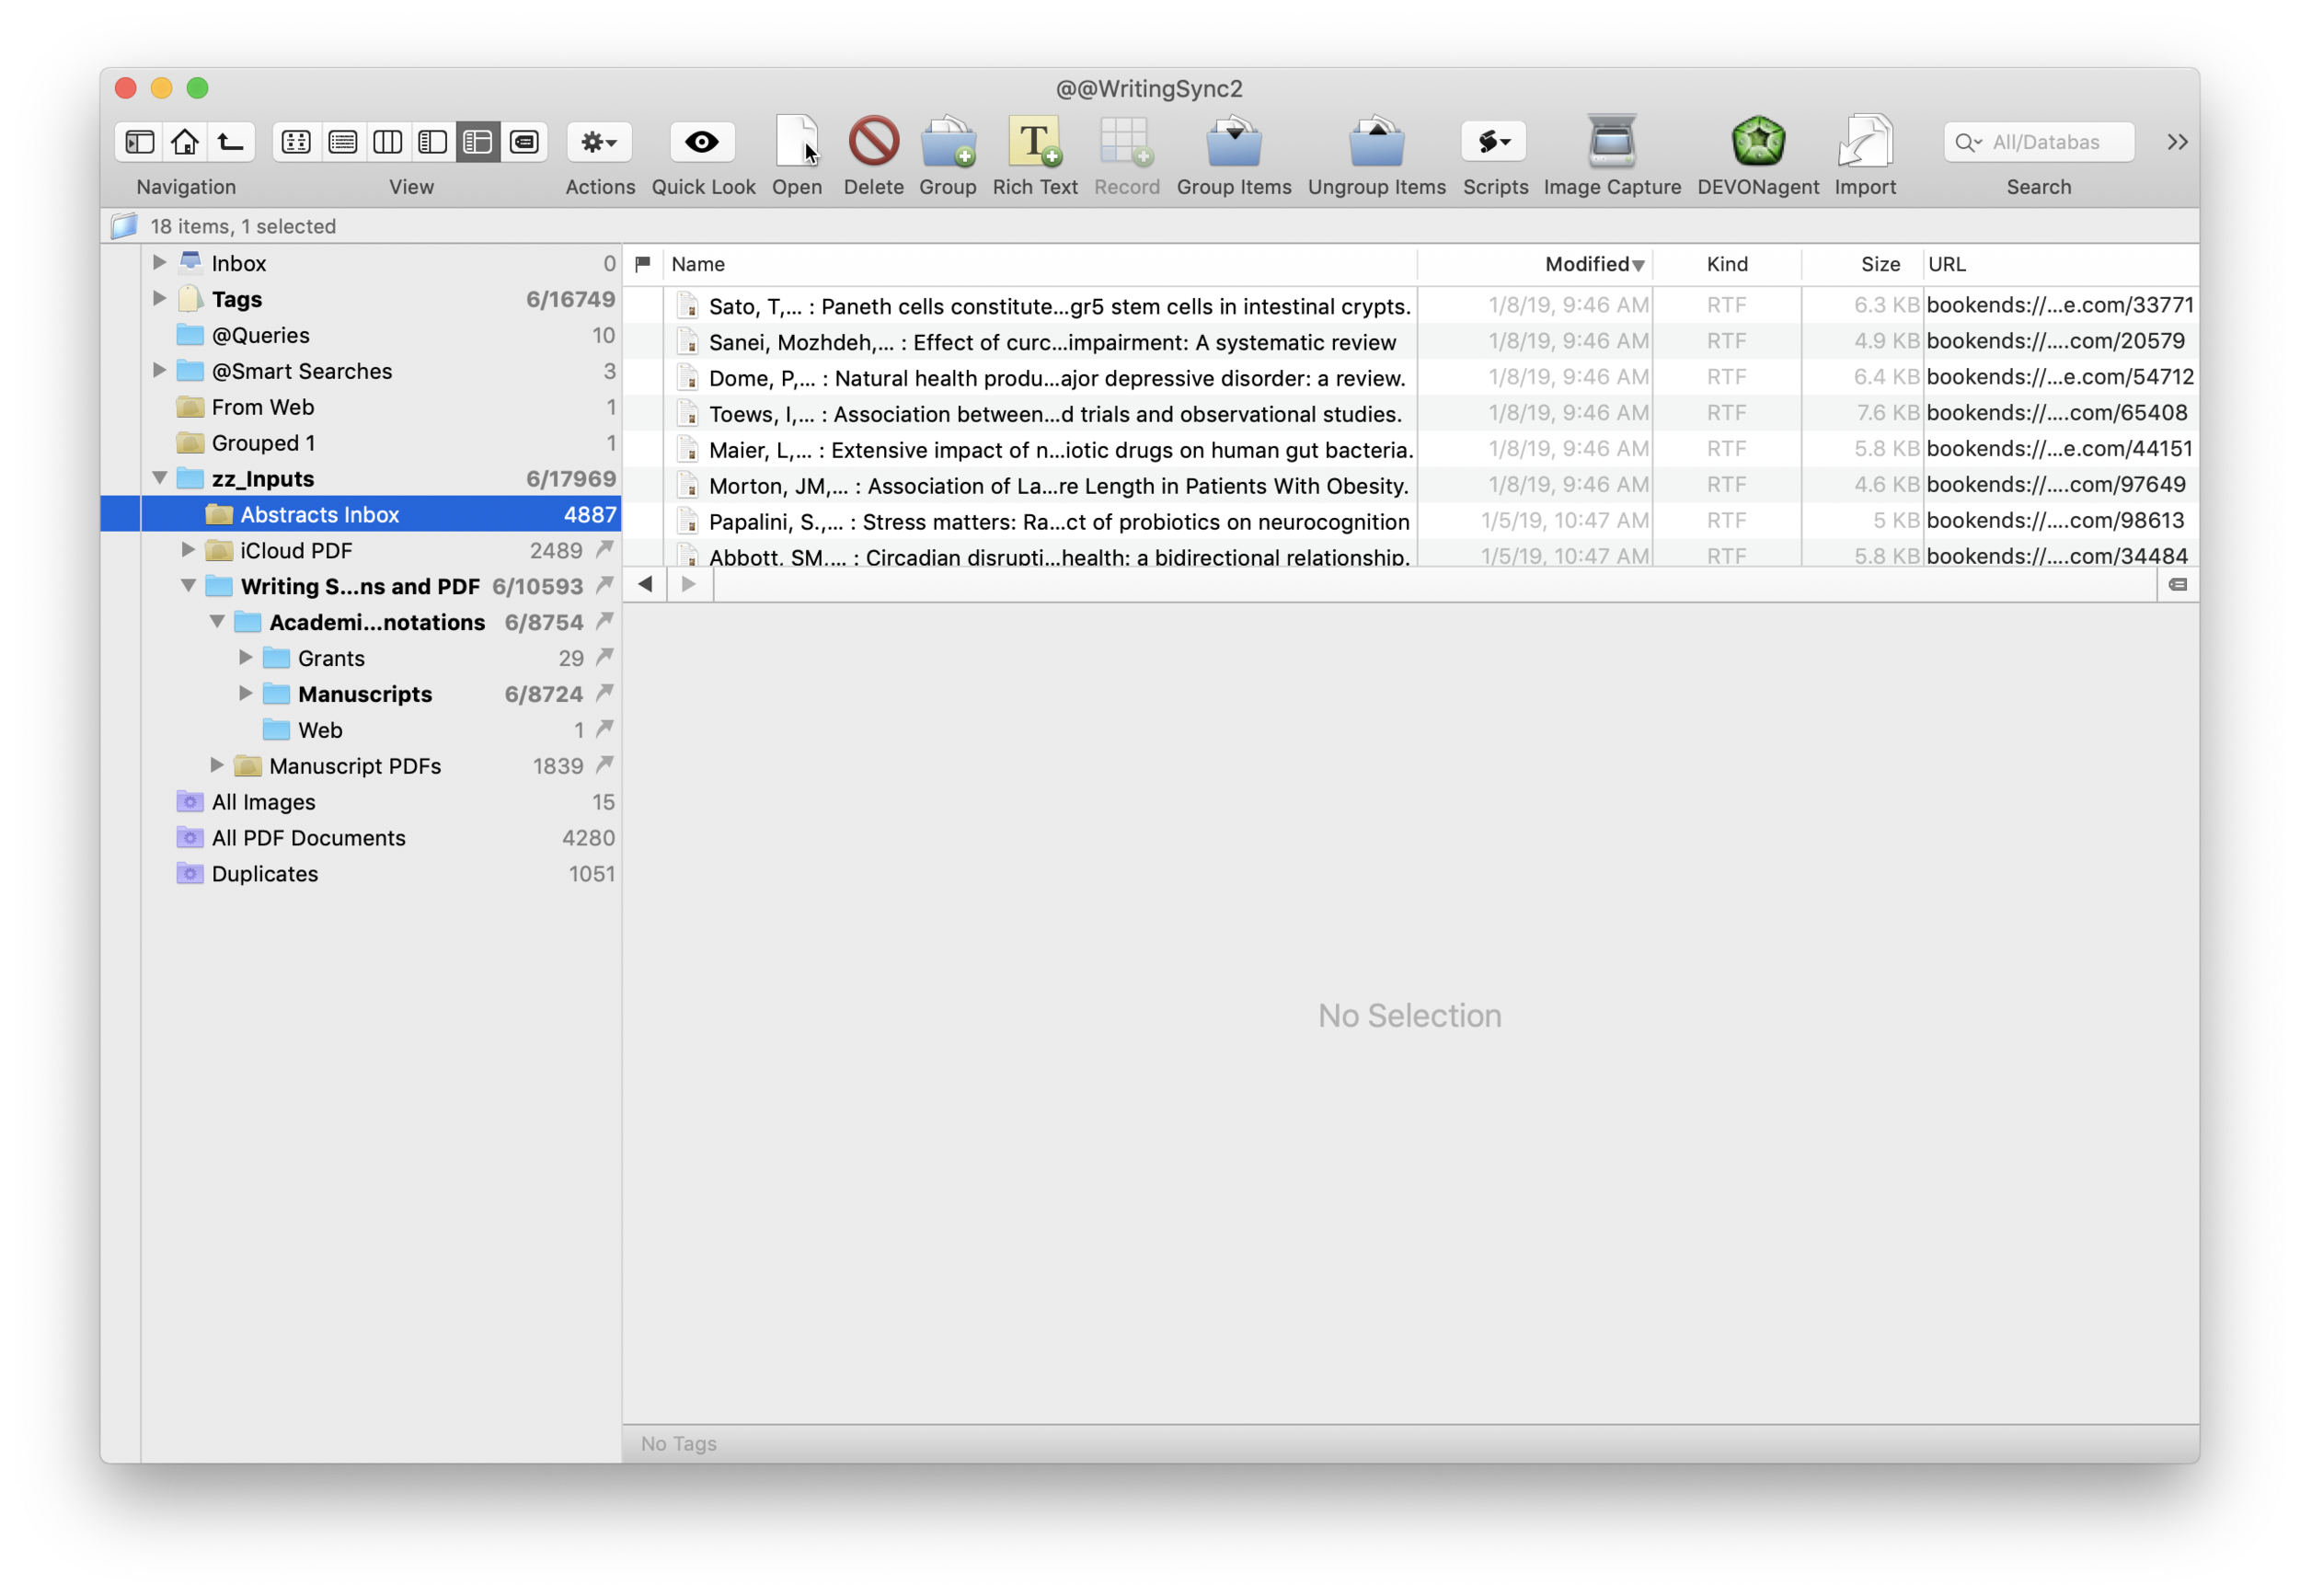
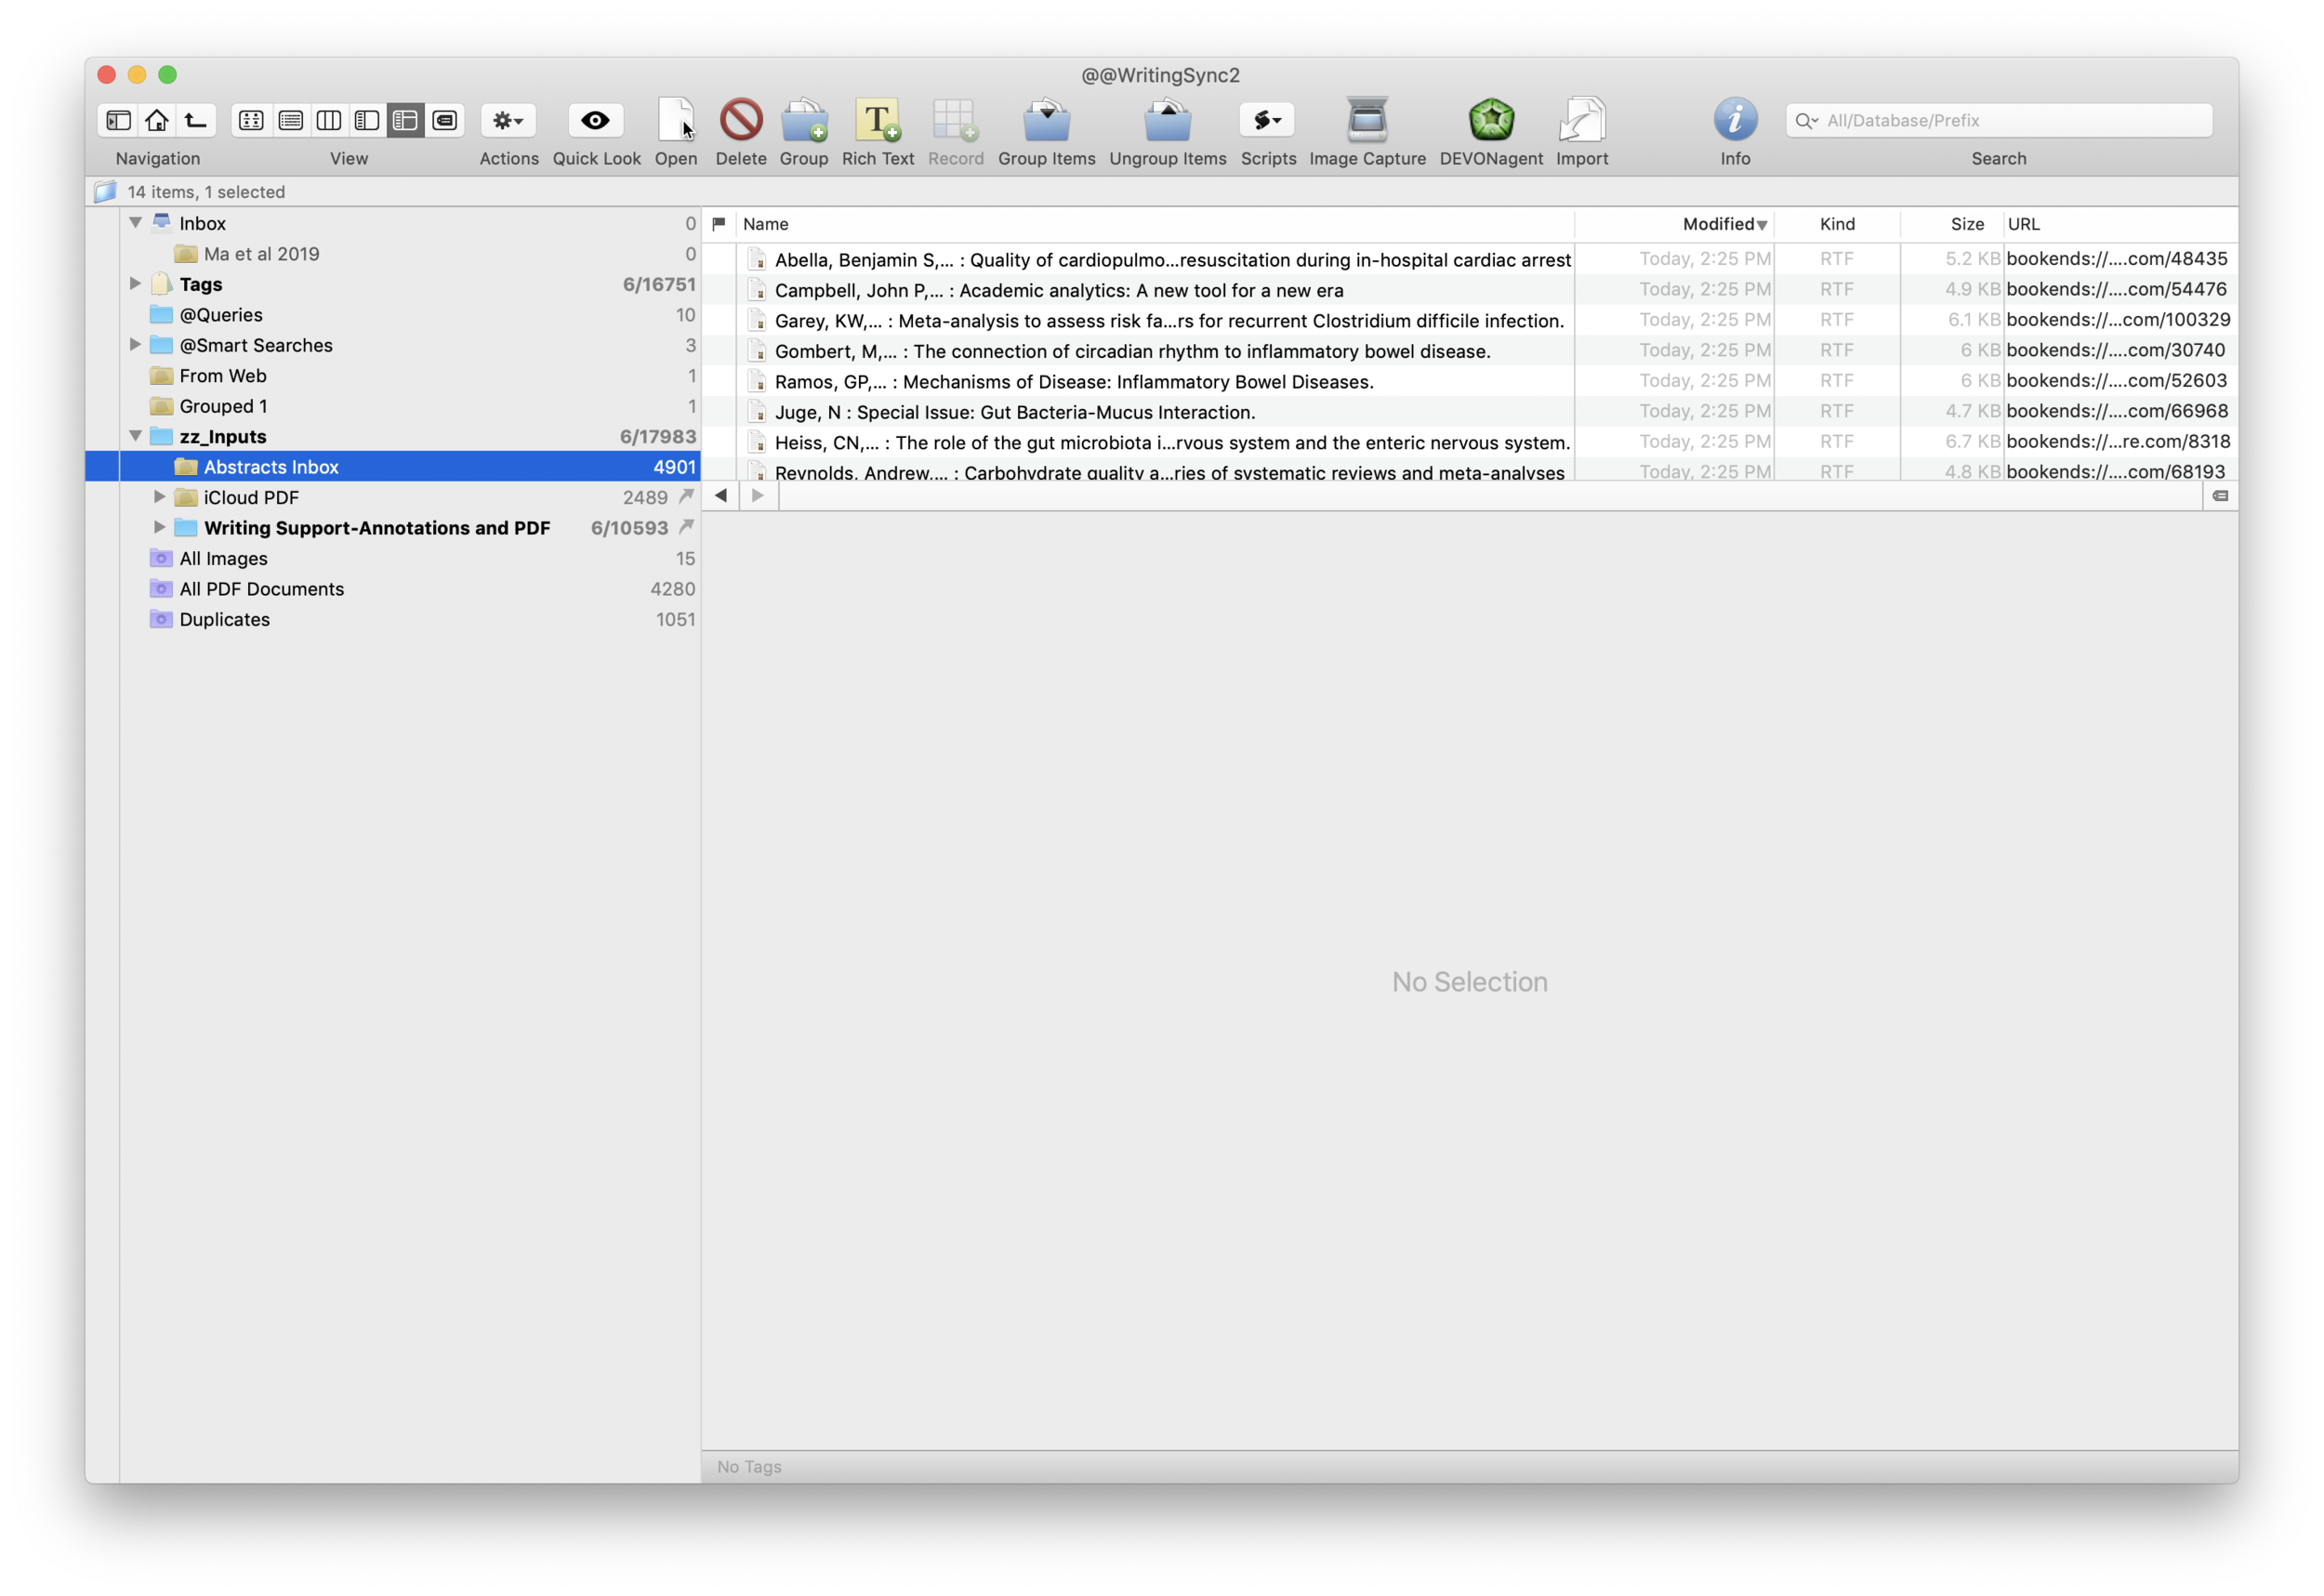
  • I return to my Inbox in Devonthink where I now have individual RTFs for each highlight or note. 
  • I insert my own comments (if I have any) in each RTF file and save each file. I ignore the link the script generates.
  • If I have a comment I plan to cut and paste directly into a future project, I append my comment with the Papers Citation Index.
  • In DevonThink, I highlight then drag and drop all the RTFs (but not the duplicate PDF of the paper) to the "Supplemental" Tab of the manuscript in Papers (this copies each RTF into the Paper folder hierarchy).
  • Finally, in Devonthink, I Index (the first time) or Update the Index (all subsequent times) - NOT IMPORT - the folder. 

The SKIM PDF Notes to DEVONthink script saves me quite a bit of time--I no longer have to parse my comments by hand. Happy writing!

Writing Workflows: Capturing Annotations to Enhance Scientific Writing and Knowledge Retrieval

As I mentioned in a previous post, reading and writing are central to my academic career. I am a voracious reader. I not only have to keep current in my clinical specialty, Anesthesiology, but also in my research areas, Simulation and Games Based Learning. Because of this, I’ve developed multiple workflows that make reading and annotating more enjoyable, efficient, and useful.I’ve mentioned my preference for Papers2 app to keep track of scientific publications. What I didn’t mention is that I’m a prodigious highlighter-it is not uncommon for me to mark up a single manuscript with dozens of highlights and notes. Keeping track of the information in manuscripts AND my thoughts about what I read used to be a real chore. Before Papers included highlighting, I had a complex workflow to accomplish this feat. Now it’s relatively simple.As I mentioned, when working with scientific literature, I like to batch operations. I go on paper collecting binges where I do little (if any) reading. Only after I’ve completed my collecting, is it time to read. I actually schedule time on my calendar to read, annotate, and synthesize ideas.This entry is about my annotation workflow–and how I use technology to speed up the process of retrieving concepts when writing and citing.I do most of my reading (and annotating) on one of two devices: my Mac or my iPad. I read so much, it’s hard to keep track of all the ideas. There are few things more frustrating than knowing I’ve read something, but being unable to find the source. This workflow alleviates the stress of finding relevant information in my library. But even more than that, using artificial intelligence in a tool called Devonthink, I can find links between concepts that were not initially apparent to me.This workflow has been a personal success. Before implementing this workflow, I could spend hours trying to track down an appropriate reference. Since implementing this workflow the same task takes seconds.I also wanted to thank Derek Van Ittersum (Kent State | blog) for inspiring me to polish this workflow–I had a chance to collaborate with Derek on the Mac Power Users 100 show.Programs needed:  

Setting Things Up

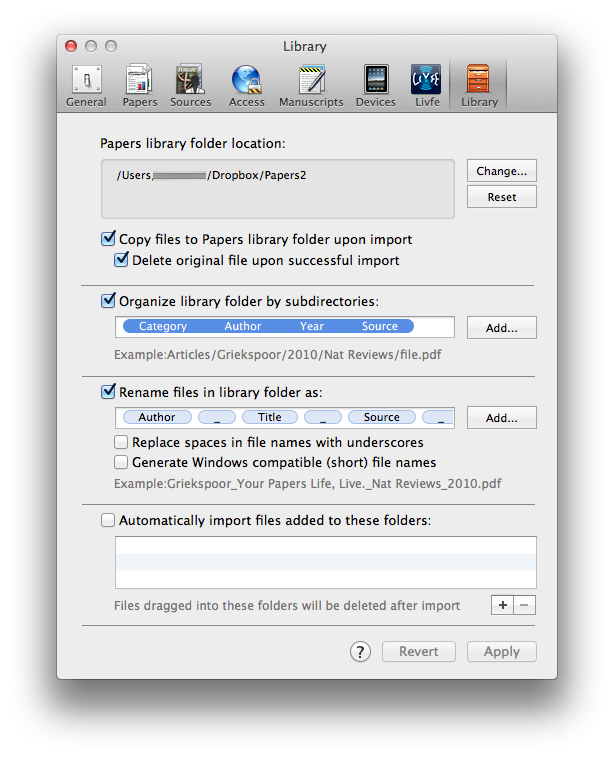
I’m assuming you’ve already installed DropBox on both your Mac and you iPad. As I discussed in a previous entry, I configure Papers save PDFs to a designated folder Dropbox. I set this up by navigating to the preference menu in Papers and designated my preferred folder you in Dropbox. I do this to have the PDFs in my Papers collection accessible from anywhere and by any tool.How Papers handles PDFsWithin the Papers preferences, I’ve configured Papers to launch a PDF in a new tab (using Papers itself, NOT an external PDF reader).Launch PDF within Papers
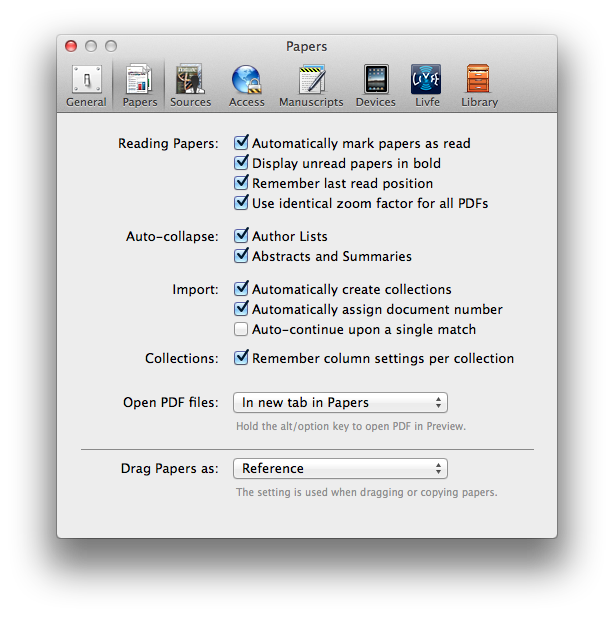
Annotating

Papers on the Mac and iPad have built in highlighting tools (on the Mac, invoked by hitting the control key over highlighted text, or on the iPad by holding a finger down and dragging). As I highlight or make notes in Papers , a separate layer is created in the PDF that keeps track of annotation information. As I annotate, each highlight and note appears under the “Notes” tab in Papers.Notes Tab in PapersIf I find a paper I’d like to read that’s not in my library I copy and paste the title and author to my OmniFocus Inbox-to be gathered during a future collecting binge. This way I don’t interrupt what I’m doing.After I’m done highlighting and note taking, I write a single summary note that captures the essence of the paper. At this point I also tag the paper Papers Keywords. Once I’ve completed my summary, if I’ve been reading on my iPad, I synchronize the PDF back to Papers on my Mac. After syncing, the annotations I made on the iPad are available on the Mac (and visa versa). If I’ve been reading on my Mac, I don’t need to synchronize to perform the next step.Once the annotated PDF is in the Papers collection on my Mac, I go to File:Export:Notes within Papers (make sure the “export selected paper” is highlighted and RTF is selected) to export a Notes file to a folder on my Desktop. RTF format is important–Devonthink relies on it.Export Notes from PapersA limitation of Papers is that it can’t export each note or highlight separately–it dumps all my annotations into a single file. I open the file and cut and paste each individual note (that represents a single highlight) into its own file. I then comment on the highlighted passage. Finally, I use the “Magic Manuscript” feature of Papers (invoked by hitting my Option Key twice) to append the citation reference to each statement.Extracted Note with Magic Manuscript CitationFinally, I drag each RTF into to the “Supplemental Files” tab of the Papers. This saves each comment in a supplemental folder residing side-by-side with the manuscript in the Papers Dropbox hierarchy.Adding RTF to Supplemental Files in PapersThe next step of the workflow uses the “Indexing” feature of Devonthink Pro Office. Using Devonthink, it is possible to index (or reference) any folder on your hard drive. This makes the contents of PDFs and RTFs available to Devonthinks Artificial Intelligence without directly importing the information into a Devonthink Database.I created a Devonthink Literature Database that indexes (does not import) my Papers2 Folder. I did this the first time by opening the File:Index… Menu item in Devonthink and navigating to the Papers Folder in Dropbox. All subsequent updates are done by opening my Literature Database, highlighting the indexed “Papers2” Folder, and navigating to File:Update Indexed Items. Indexing can takes quite some time–be patient.Devonthink IndexingThis all sounds complicated, but trust me, it’s worth it. What this allows me to do is open Devonthink and find any statement, concept, or related item quickly. I can then cherry pick comments related to my search and paste them into a draft document with little modification.When I’m writing, I take all related concepts and paste all of them into a single card in Scrivener. This allows me to arrange, and rearrange information to help support my argument. Because I took the time up front to include the Magic Manuscript Index from Papers, no further searching or citation work is needed, until I’m ready to format my bibliography.Scrivener for iOS is under development–it is likely my workflow will change when it is released. Instead of using Scrivener, one might consider using Tinderbox –Derek’s tool of choice or the newly announced Scapple (by the makers of Scrivener). I will cover the next step of the writing process using these tools in an upcoming entry.

Closing

In this entry I’ve covered my annotation workflow and how I make use of my annotations when writing. Using Dropbox, I can access my highlighted manuscripts from anywhere. Using a combination of Papers and Devonthink I can make use of my annotations saving me countless hours of time when writing.